Quick Verdict: Learning how to install metal roofing is a realistic goal for homeowners who take the time to plan carefully. Corrugated metal panels are beginner-accessible, cost $3.50–$12 per square foot installed, and last 25–40 years. Standing seam systems run $7–$30 per square foot, demand advanced skill, and last 50–70 years. The biggest trade-off: DIY installation saves $5,000–$12,000 in labor on a typical 2,000 sq ft roof, but mistakes on standing seam systems are costly to fix.
Last updated: April 2026 | 14 min read
In This Guide
Your asphalt shingle roof has a 15–30 year expiration date baked in from the day it was nailed down. A properly installed metal roof, by contrast, lasts 40–70 years according to BCM Roofing, which is why metal roofing has become one of the fastest-growing segments in residential renovation. Beyond longevity, metal sheds snow more efficiently, reflects radiant heat, and resists wind speeds asphalt panels fail at.
For homeowners willing to put in the work, knowing how to install metal roofing correctly opens the door to significant savings. Labor typically accounts for 40–60% of total project cost, according to HomeAdvisor, which means tackling the work yourself on a 2,000 sq ft roof converts roughly $8,000–$15,000 of contractor labor into your own weekend hours. Before deciding, though, you need an honest read on your skill level, your roof’s complexity, and which panel system fits your project.
Should You DIY Your Metal Roof? Honest Skill Assessment
Metal roofing installation is not equally difficult across all roof types. The gap between corrugated exposed-fastener panels and a standing seam metal roof system is wide, and treating them as equivalent is one of the most common planning errors homeowners make.
Before purchasing materials, answer these four questions honestly:
- Roof pitch: Pitches below 3:12 require specialized sealing techniques. Corrugated panels need a minimum 3:12 pitch per the lapped-system provisions of IRC Section R905.10. Standing seam snap-lock systems work on slopes as low as 1:12 with proper underlayment and sealed seams, according to WeatherShield Roofing.
- Roof complexity: A simple gable roof with few penetrations is a realistic DIY project. Roofs with multiple valleys, skylights, dormers, and chimneys multiply the number of custom flashing cuts required and increase the skill threshold substantially.
- Helper availability: Metal panels are long, heavy, and awkward to position alone. A second person is necessary for safe panel handling, especially on pitches above 6:12.
- Physical comfort at height: Spending full days on a pitched roof demands stamina and a genuine comfort with elevation. Anyone who hesitates on a ladder should step back and reconsider this project.
As a general rule, corrugated metal roofing is appropriate for homeowners with basic carpentry skills and comfort on a roof. A DIY metal roof with standing seam panels is better suited to experienced DIYers who have completed at least one large exterior project and are prepared to invest in specialty tools.
| Your Situation | Recommendation |
|---|---|
| Simple gable roof, basic carpentry experience | DIY with corrugated panels |
| Complex roof, first-time metal project | Hire a contractor |
| Experienced DIYer, simple or moderate layout | DIY with corrugated or standing seam |
| Pitch below 3:12, multiple penetrations | Hire a contractor |
| Budget-focused, simple hip or gable roof | DIY with corrugated panels |
Once you know where your skills fit on the spectrum above, the next consideration is physical risk. Metal roofing introduces hazards standard home repair projects do not.
Safety on the Roof: Non-Negotiable Rules
Residential roofing consistently ranks among the most dangerous DIY activities, and metal panels add specific hazards asphalt shingle work does not. Metal is slippery even when dry, and a wet or frost-covered metal panel provides almost no grip at all.
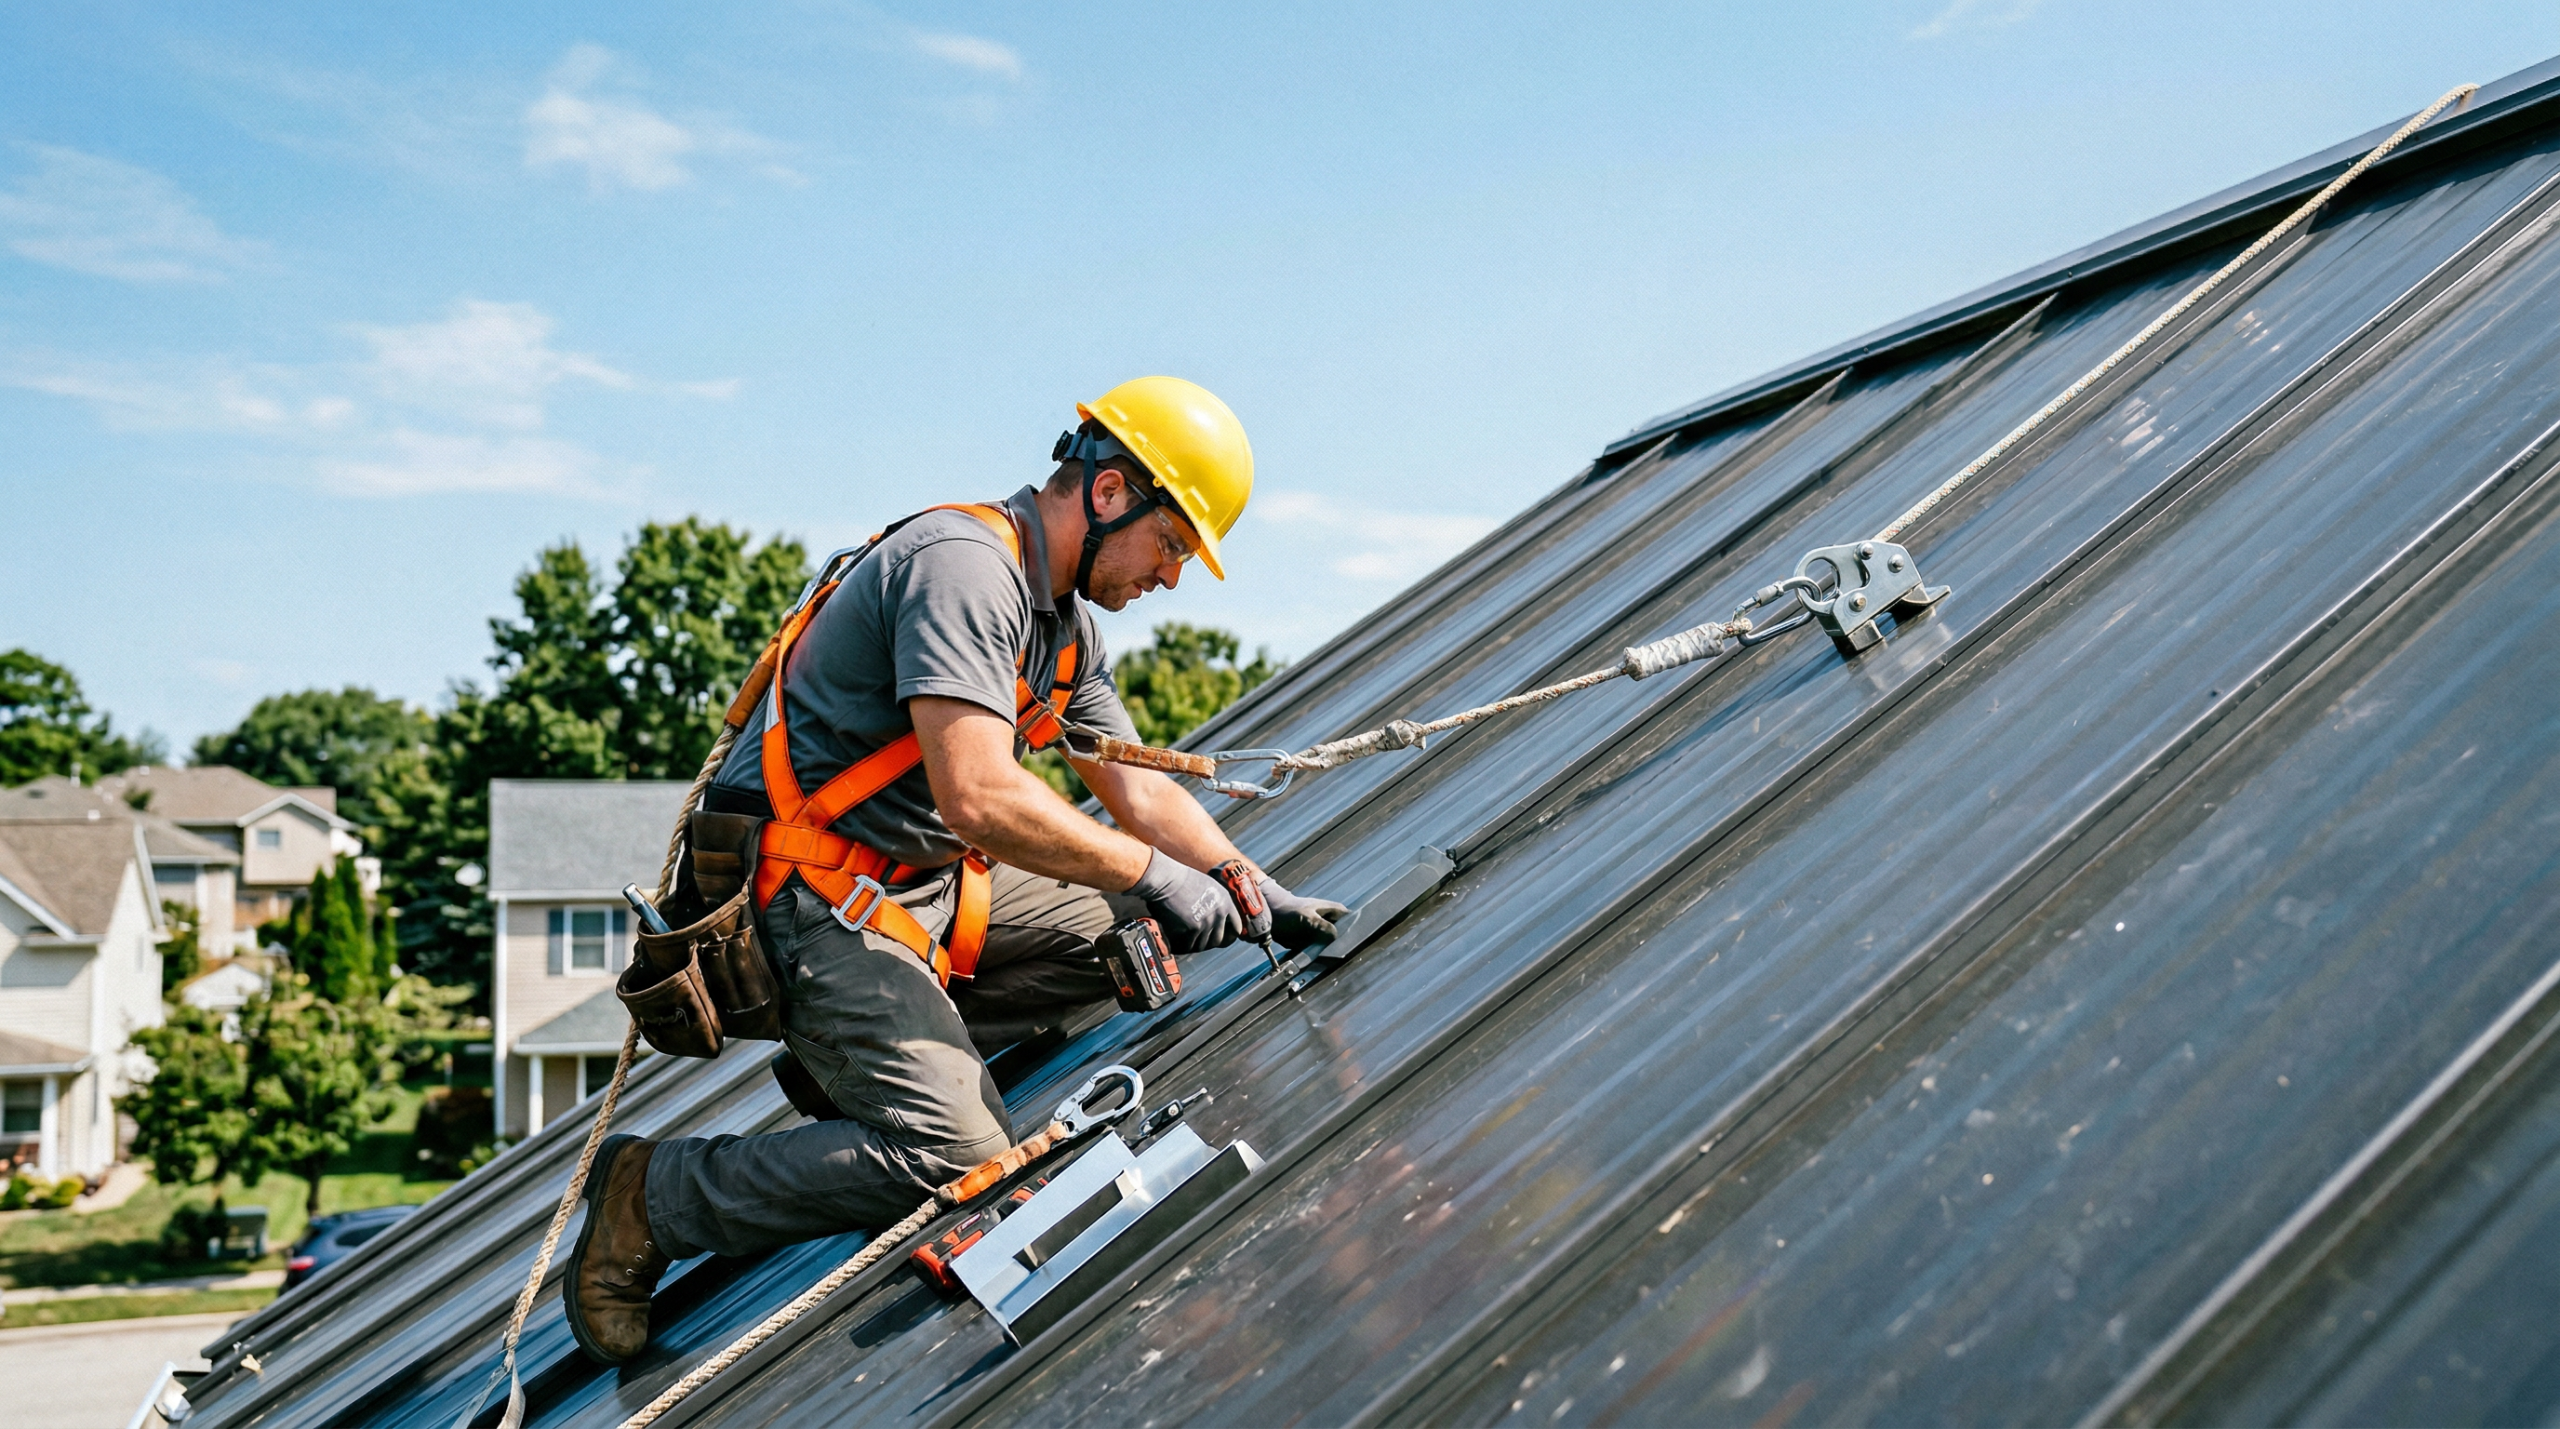
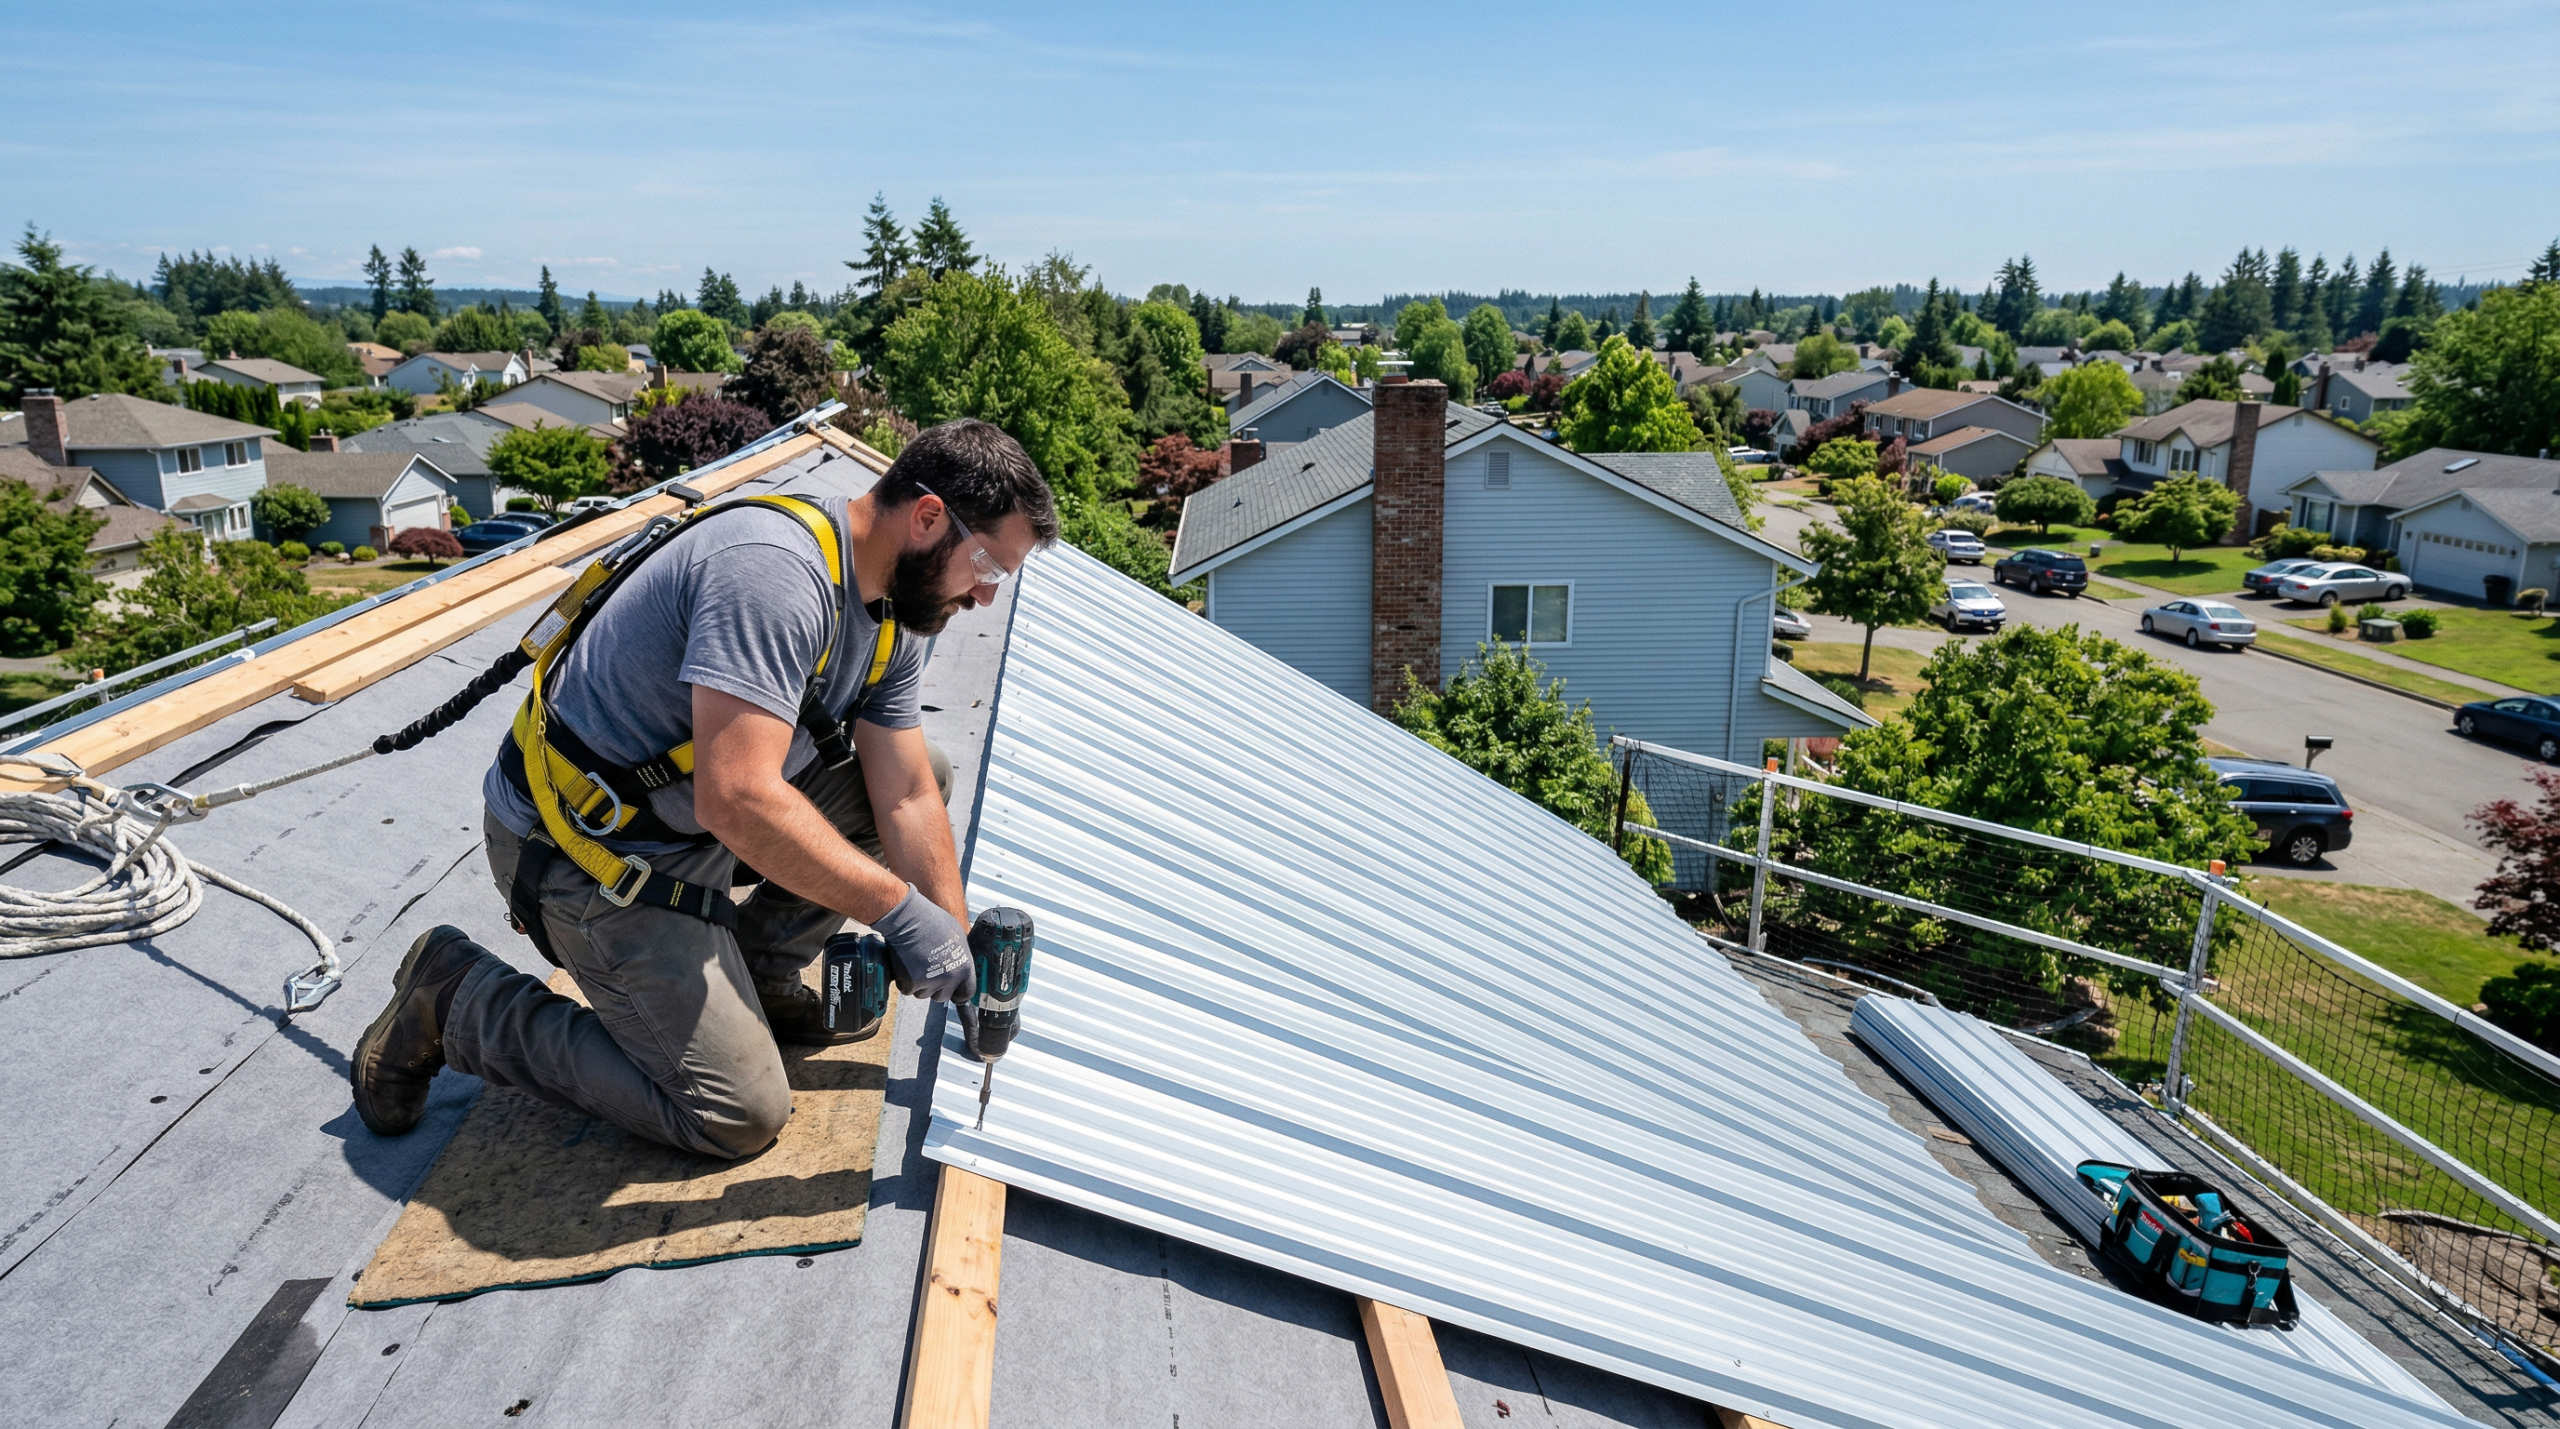
Fall protection is the first priority. Install a roof anchor rated for your pitch and weight before stepping on the deck. Connect a 50-foot lifeline to the anchor and use a shock-absorbing lanyard attached to a full-body fall arrest system. Position the anchor at or above the ridge so the lifeline pulls upward rather than at an angle. Although OSHA fall protection standards technically apply to employers and their employees rather than to homeowners working on their own property, the OSHA 6-foot threshold is a proven safety benchmark worth following regardless of legal obligation. A fall from as low as 6 feet causes serious injury.
Beyond fall hazards, metal shavings called swarf, created during panel cutting, are a serious eye injury risk. Always wear safety glasses when operating a circular saw or tin snips on metal panels. Cutting panels upside down keeps the shavings away from your face and reduces scratching on the panel finish. Sweep the deck with your magnetic sweeper after every round of cuts, since metal shavings left on the roof surface rust quickly and stain panels brown.
Weather is equally important. Never work on metal panels during rain, after rain until they dry fully, or when frost is possible in the early morning hours. Avoid high-wind days above 20 mph; long panels act as sails and create serious control problems. In summer heat, metal panels reach surface temperatures of 140–180°F on sunny days. Schedule work for early morning hours and wear long sleeves to avoid contact burns from panel edges. For pitches above 8:12, roofing jacks set at 24-inch intervals provide the secure footing needed to work safely.
With safety protocols established, the next step is choosing which panel system matches your project.
Types of Metal Roofing: Corrugated vs. Standing Seam
Choosing between corrugated metal roofing and a standing seam metal roof is the single most consequential decision in this project. Both are durable metal systems, but they differ significantly in cost, installation method, and long-term maintenance demands.
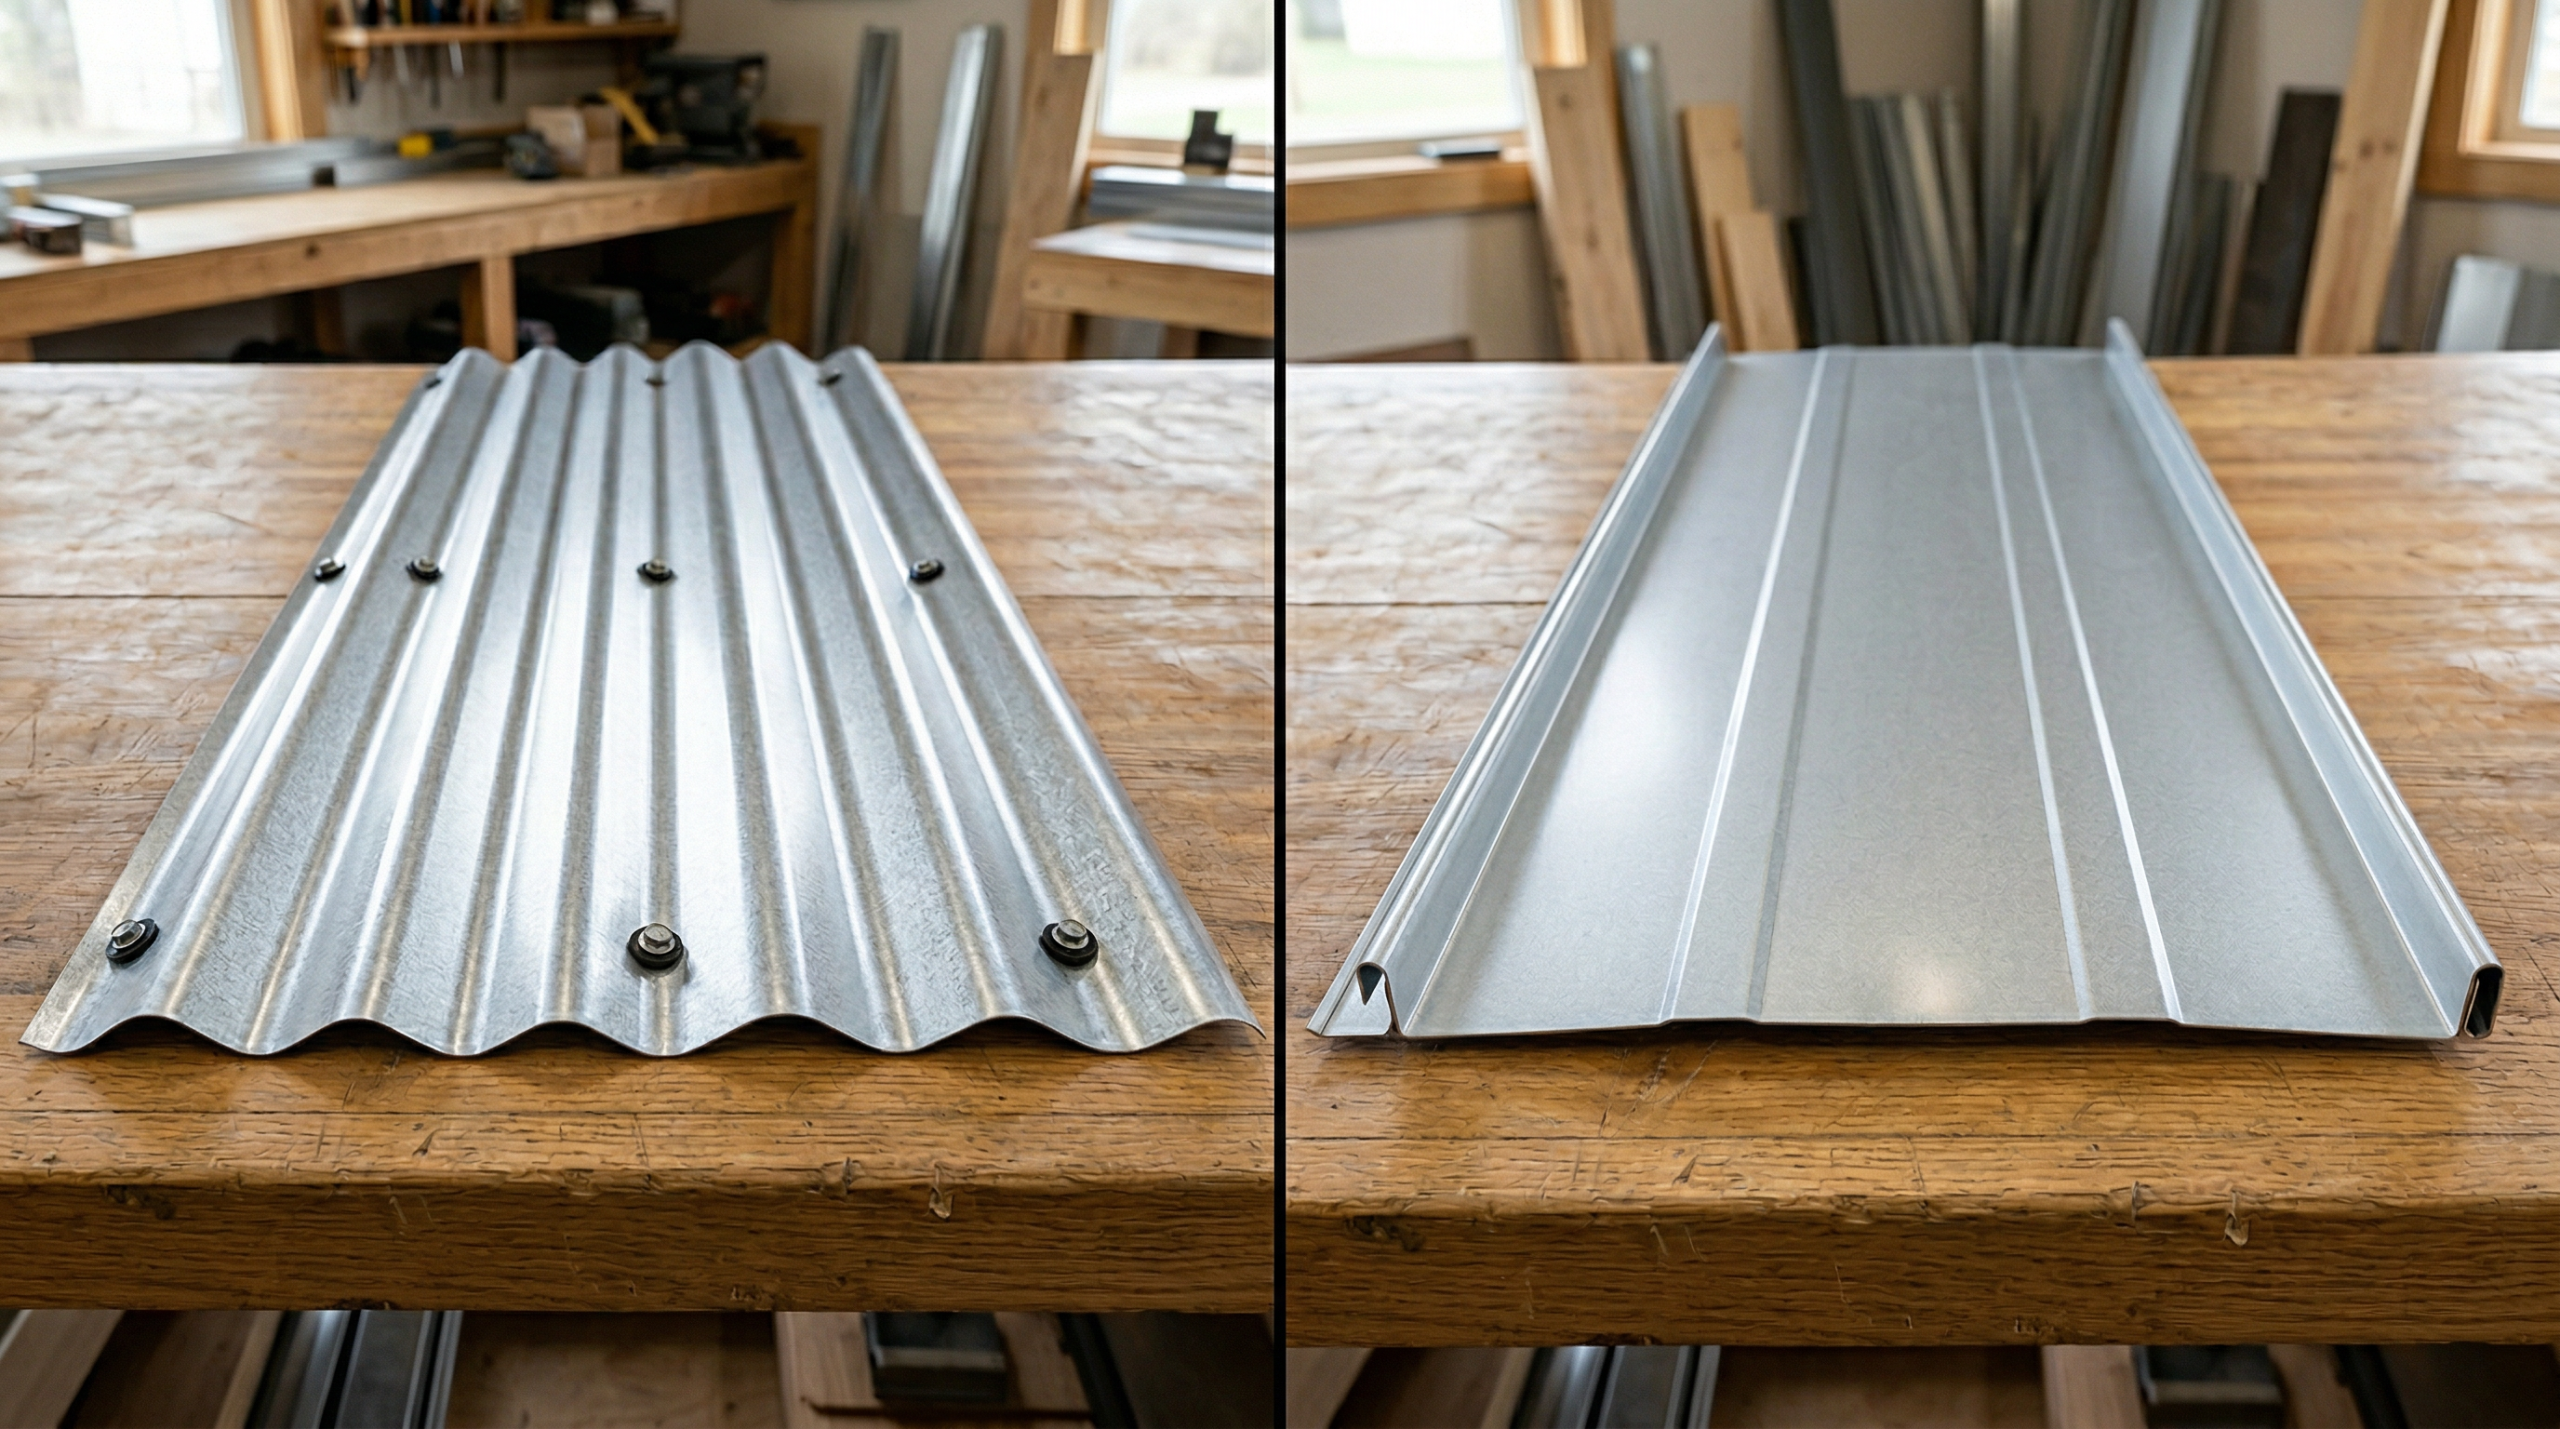
Corrugated panels use exposed fasteners, meaning screws with neoprene washers pass directly through the panel face into the roof deck. The approach is straightforward and materials cost less, making it the default choice for first-time DIYers. However, those exposed fasteners require periodic inspection and possible resealing every 15–20 years as washers degrade, according to Joyland Roofing.
A standing seam system attaches with hidden clips, locking into raised seams between panels. No fastener ever penetrates the panel face, which eliminates the leak risk at fastener points and allows the metal to expand and contract freely with temperature changes. However, standing seam installation requires specialized tools such as a hand seamer and hemming tool, and the system is far less forgiving of alignment errors.
| Feature | Corrugated Panels | Standing Seam |
|---|---|---|
| Installed Cost (all-in) | $7–$12/sq ft | $7–$30/sq ft |
| Fastener Type | Exposed (through panel face) | Hidden (clip system) |
| Lifespan | 25–40 years | 50–70+ years |
| DIY Difficulty | Beginner-accessible | Advanced |
| Minimum Pitch | 3:12 | 1:12 (with sealant) |
| Maintenance | Fastener check every 15–20 yrs | Minimal; periodic inspection only |
| Best For | Budget-focused, simpler roofs | Long-term performance, complex designs |
As a result, for most homeowners attempting their first metal roofing project, corrugated panels are the practical choice. The standing seam system is worth the premium on homes where you plan to stay long-term and want near-zero maintenance for 25 years.
What You’ll Need: Tools and Materials Checklist
Assembling the right equipment before you start saves hours of mid-project delays. Below is a complete list, separated by safety gear, standard tools, specialty tools, and materials.
Safety Gear (Non-Negotiable)
- Fall arrest body safety system (full-body fall arrest rig rated for your weight and pitch)
- 50-foot lifeline with a shock-absorbing lanyard
- Non-slip rubber-soled boots (avoid sneakers; they slip on bare metal)
- Cut-resistant work gloves (metal edges are razor-sharp)
- Safety glasses with side shields
- Hearing protection for saw cuts
Standard Tools
- Drill with adjustable clutch (critical for screw torque control)
- Circular saw with a metal-cutting carbide blade
- Tin snips: left-cut, right-cut, and straight
- Chalk line and reel
- 25-foot tape measure
- Framing square
- Pry bar and hammer (for tearoff)
- Magnetic sweeper (for collecting metal shavings from the deck)
Specialty Tools (for Standing Seam or Advanced Work)
- Turbo shear attachment for drill (faster, cleaner panel cuts)
- Hand seamer (for bending and finishing seam edges)
- Hemming tool (for folding panel edges at rakes and eaves)
- Electric seaming tool (for mechanically seamed standing seam systems)
First-time DIYers should budget $200–$500 for tool purchases or rentals beyond what most homeowners already own. For instance, the turbo shear alone runs $60–$120 as an attachment and pays for itself in time saved on a full roof.
Materials Checklist
- Metal panels (order with 10–15% waste factor built in)
- Synthetic underlayment (preferred over felt for metal roofs)
- Ice and water shield (for cold climates; required in first 24–36 inches from eave)
- Drip edge (aluminum, matching panel color)
- Inside and outside closure strips
- Butyl tape for sealing
- Self-drilling metal roofing screws with neoprene washers
- Ridge cap panels
- Flashing for valleys, chimneys, and pipe penetrations
- Pipe boot seals for vent stacks
Permits and Building Code: What DIYers Must Know
With your tools and materials assembled, the next step is making sure you have legal clearance to proceed. Skipping the permit process is one of the costliest mistakes in any DIY roofing project. Beyond the fines, an unpermitted roof replacement complicates home sales and insurance claims down the road.
In most jurisdictions, a full roof replacement always requires a permit, especially when changing the roofing material type (for example, switching from asphalt shingles to metal). Overlay installations, where new metal panels go over existing shingles, often require a permit as well, though some jurisdictions exempt minor repairs. Contact your local building department before purchasing a single panel.
When pulling a DIY permit, bring:
- A simple roof plan with dimensions and pitch noted
- The product spec sheet for your chosen panel system
- Proof of property ownership
- The estimated project value (needed for permit fee calculation)
Key code considerations for metal roof projects include layer limits (most jurisdictions cap roofing layers at two, total), wind uplift requirements (critical in hurricane zones; panels must meet local ASCE 7 wind speed minimums), and ice and water shield minimums in cold climates. In many northern states, ice and water shield is required from the eave up to 24 inches inside the heated wall line. Confirm the specific requirements for your region before finalizing your material list.
Plan on 2–4 weeks for permit approval in most areas. Schedule your materials delivery after permit issuance, not before.
Step-by-Step: How to Install Metal Roofing
The steps below cover how to install metal roofing on a standard gable roof using corrugated panels. A standing seam metal roofing installation follows the same sequence for deck prep, underlayment, and flashing, but differs significantly at the panel layout and fastening stages. Understanding this sequence before purchasing materials saves time and prevents costly errors. Always consult your panel manufacturer’s installation guide for standing seam-specific fastening specs before starting.
Step 1: Measure and Estimate Materials
First, calculate your roof’s actual surface area, not your home’s footprint. Multiply the footprint length by width for each plane, then apply a slope correction factor based on your pitch (a 6:12 pitch adds roughly 12% more surface area than the flat footprint). Add 10–15% for waste from cuts, valleys, and panels damaged during installation. Order panels in full lengths when possible; factory-cut edges are cleaner and faster to install than site cuts.
Step 2: Tear Off Existing Roofing, or Decide to Overlay
A full teardown is the recommended approach for most metal roof replacement projects. Removing old shingles lets you inspect the deck, find rot, and ensure a flat nailing surface. Overlay installation, where metal panels go directly over existing shingles, is code-permitted in many areas as long as no more than two total roofing layers exist. However, shingle ridges and valleys telegraph through thinner metal panels over time, and trapped moisture between layers accelerates deck deterioration, according to City Side Roofing. If you overlay, install a layer of rigid foam or a ventilated batten system between the shingles and metal panels to break the moisture contact.
Step 3: Inspect and Repair the Roof Deck
Walk the entire deck systematically after tearoff, pressing down every few feet to find soft spots. Next, replace any plywood or OSB panels with visible rot, delamination, or water staining. Set protruding nail heads flush or below the surface, because high nails create bumps under metal panels and stress fastener points. Confirm the deck has adequate ventilation pathways before proceeding, as metal roofing traps heat more efficiently than shingles.
Step 4: Install Synthetic Underlayment
Synthetic underlayment is strongly preferred over traditional felt for this application because it tolerates the longer installation timeline without degrading and resists tearing during panel positioning. Start at the eave, roll horizontally across the deck, and overlap each course 4 inches minimum. At end laps, overlap 6 inches. In climates with average winter lows below 0°F, install ice and water shield instead of underlayment in the first 24 inches inside the exterior wall line (extend to 36 inches on steep roofs of 8:12 or greater), per IRC Section R905.1.2. Fasten the underlayment with cap nails or roofing staples at 12-inch intervals along edges and 18 inches in the field.
Step 5: Install Drip Edge and Closure Strips
Drip edge installs before the first panel goes up. Along eaves, slip the drip edge under the underlayment and fasten it to the fascia board at 12-inch intervals. On rake edges, the drip edge goes over the underlayment. Eave closure strips, which are foam pieces shaped to match your panel profile, attach along the eave with butyl tape to block insects and wind-driven water from entering the corrugation voids beneath the panels. These are easy to overlook and important not to skip.
Step 6: Plan Panel Layout
Squaring the roof before placing the first panel prevents cumulative alignment errors across the entire installation. Use the 3-4-5 method to establish a true 90-degree reference line from the eave: measure 3 feet along the eave edge and 4 feet up the slope, then confirm the diagonal between those two points measures exactly 5 feet. Snap chalk lines every panel-width across the deck to guide panel placement. Start at the gable end opposite your prevailing wind direction so panel overlaps shed water rather than collect it.
Step 7: Install the First Panel
The first panel is the most critical step in the entire project. Align it precisely with your chalk reference lines and let it overhang the eave by 1 to 1.5 inches over the drip edge. Check square at both the top and bottom of the panel before driving a single fastener. A panel set even slightly off-square compounds across subsequent panels, and by the time you reach the opposite rake, you lose several inches of alignment. Take the extra time here; fixing a misaligned first panel midway through the project requires stripping out hours of work.
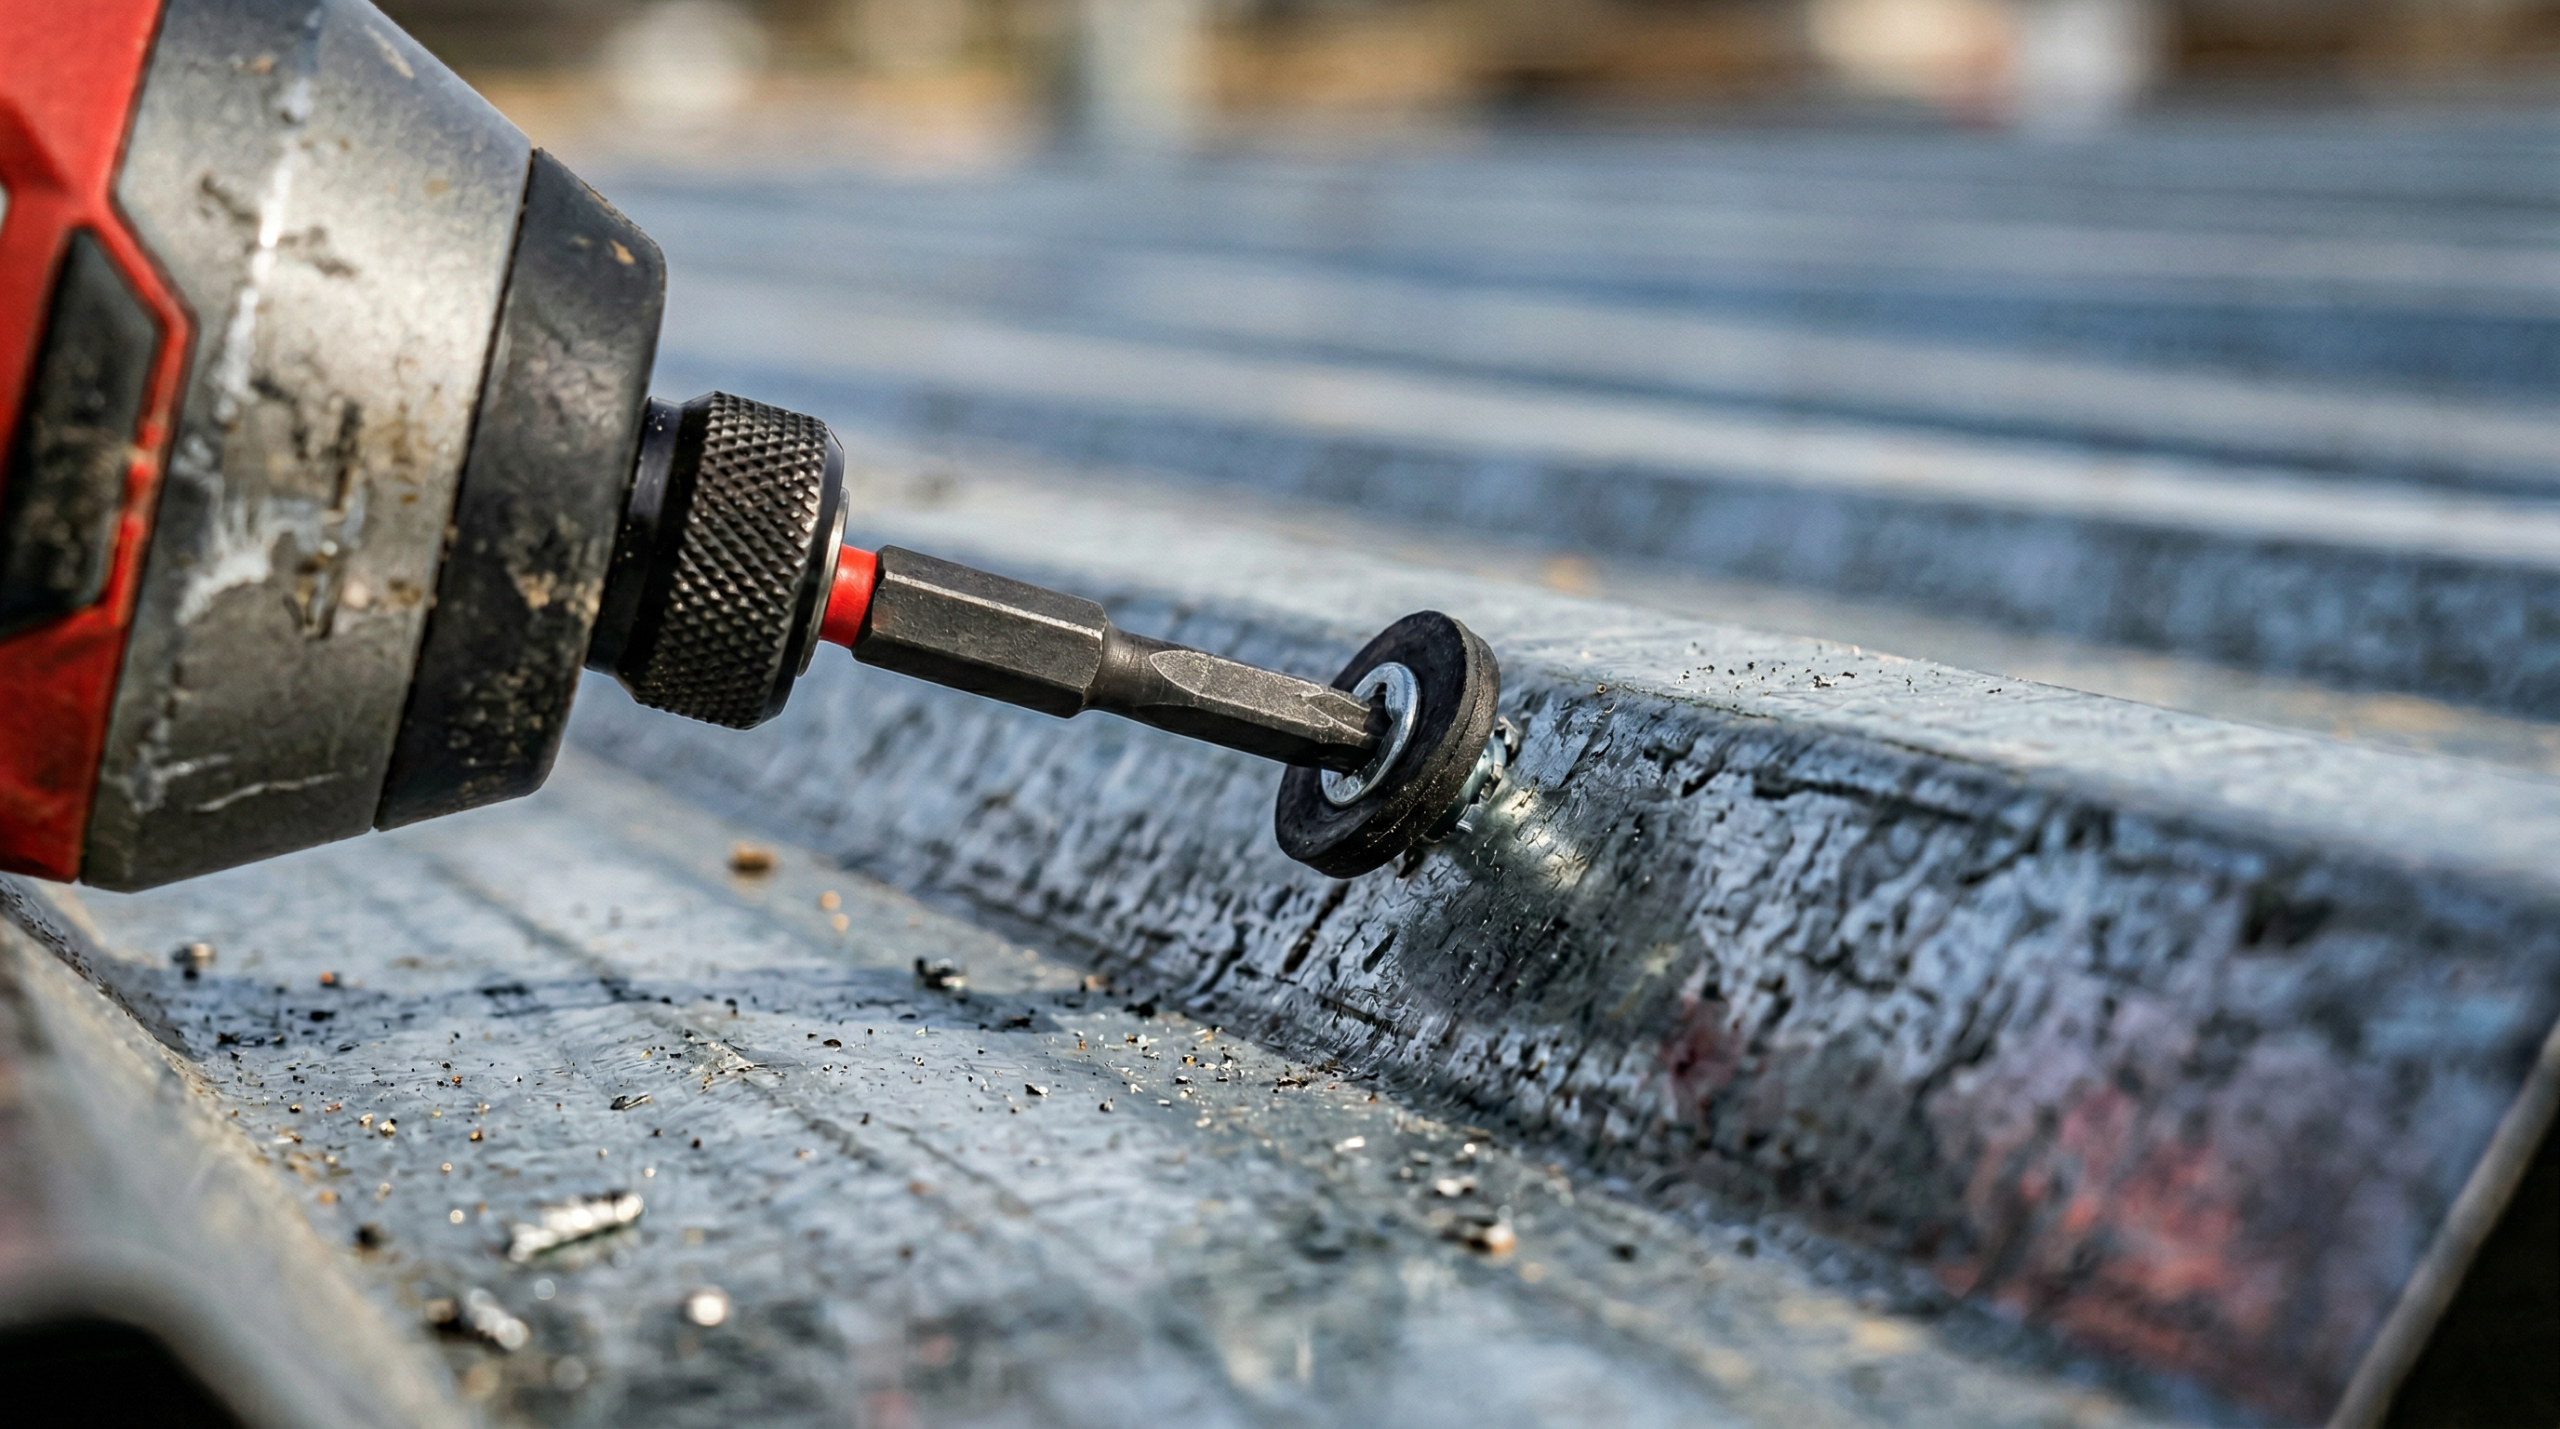
Step 8: Fasten Panels and Overlap Correctly
For corrugated panels, overlap each new panel by one full corrugation on the side lap. Drive screws through the flat of the panel, not the rib peaks, using a torque-controlled drill. The neoprene washer should compress enough to spread to the edge of its metal cap without deforming beyond it. Under-driven screws leave gaps for water ingress; over-driven screws crush the washer and create a leak path within a few years, per Great Northern Metals. Follow your panel manufacturer’s fastener spacing schedule, as this varies by panel width and wind uplift zone.
Step 9: Install Flashing at Valleys, Chimneys, and Penetrations
Custom-bent flashing at valleys, chimneys, and pipe penetrations is where the installation process gets more complex. Valley flashing installs beneath the panel edges with butyl tape along both sides. Chimney flashing requires step flashing on the sides and a saddle flashing behind. Each penetration also needs a pipe boot, which is a rubber seal molded to the vent stack diameter. Apply butyl tape generously at every flashing transition and press it firmly before securing fasteners. These transition points, not the field panels, are where most metal roof leaks originate. For a deeper walkthrough on tracking down and sealing these vulnerable spots, the guide on finding and fixing roof leaks covers detection techniques from the attic side and exterior.
Step 10: Install Ridge Cap
Outside closure strips go on first at the ridge to block airflow and insects at the panel peaks. Press them firmly against the panel with butyl tape before positioning the ridge cap. Overlap ridge cap pieces by 6 inches minimum, and fasten through both layers. For ventilated ridge designs, the ridge cap has perforations built in; do not seal these off, as they are part of the attic ventilation system. Finally, sweep the roof with a magnetic sweeper to collect all metal shavings (called swarf) before they rust and stain the panels.
Metal Roofing Cost Breakdown: What DIYers Pay
Now you understand the full installation process, so here is what it costs in practice. In contrast to asphalt shingle jobs, metal roof cost varies more than most homeowners expect before they begin pricing. The range from $3.50 to $30 per square foot reflects real differences in material type, panel system, metal gauge, region, and whether you hire a contractor or learn how to install metal roofing yourself.
| Scenario | Cost per Sq Ft | 2,000 Sq Ft Estimate |
|---|---|---|
| Corrugated – DIY materials only | $1.50–$4.00 | $3,000–$8,000 |
| Corrugated – Contractor installed | $7.00–$12.00 | $14,000–$24,000 |
| Standing seam – DIY materials only | $2.20–$8.25 | $4,400–$16,500 |
| Standing seam – Contractor installed | $7.00–$30.00 | $14,000–$60,000 |
Source: Western States Metal Roofing and HomeAdvisor.
The material type affects cost independent of the panel system. Steel (galvalume or galvanized) runs $1.50–$4.00 per square foot for materials. Aluminum costs $3.50–$6.50. Copper and zinc, while extremely long-lived, reach $13–$25 per square foot for materials alone, per Western States Metal Roofing.
Beyond panel costs, a realistic DIY budget includes: synthetic underlayment ($0.15–$0.35/sq ft), permit fees ($100–$500 depending on jurisdiction), drip edge and closure strips ($150–$400 for a standard roof), screws ($80–$200), ridge cap ($3–$8 per linear foot), flashing materials ($100–$400), and tool purchases or rentals ($200–$500). Total those figures for a 2,000 sq ft corrugated project and the realistic all-in cost lands between $5,500 and $11,000, which is $5,000–$12,000 less than most contractor quotes for the same work.
5 Common DIY Metal Roofing Mistakes (and How to Avoid Them)
These five mistakes appear across countless DIY metal roofing installations. Each one creates a leak or a structural problem requiring professional repair to fix properly.
Mistake 1: Overtightening screws. When a screw compresses the neoprene washer beyond the edge of its metal cap, the rubber splits and the waterproof seal fails. The fastener still looks secure from a distance, but water enters through the compromised washer within one or two freeze-thaw cycles. Use a torque-controlled drill and check the washer visually on every tenth screw until you develop a consistent feel for the correct depth.
Mistake 2: Wrong screw placement on corrugated panels. Depending on the panel profile and installation location (eave versus field), screws belong in the flat of the panel or in the valley, not the rib peak. Per Great Northern Metals, always consult your panel manufacturer’s installation guide before fastening, because placement varies by brand and panel design. Screws driven through rib peaks on panels requiring flat-fastening create stress concentrations and water collection points.
Mistake 3: Skipping ice and water shield in cold climates. Synthetic underlayment alone is insufficient in regions with average winter temperatures below 25°F. Ice dams force water upward under panels and underlayment alike. Specifically, installing ice and water shield in the first 24–36 inches above the eave costs roughly $0.50–$0.80 per square foot and prevents a repair bill several times larger.
Mistake 4: Not squaring the first panel. A first panel set one degree off-square causes progressively drifting alignment across the roof. By the time you reach the opposite rake edge, the misalignment reaches several inches, enough to leave the last panel undersized or hanging beyond the roof edge. Therefore, spend 30 minutes checking and rechecking the first panel with a framing square and chalk line before fastening.
Mistake 5: Mixing incompatible metals. Galvanic corrosion occurs when dissimilar metals contact each other in the presence of moisture. Copper flashing against aluminum panels is a common example; the electrochemical reaction eats through the aluminum at the contact point within a few years. To avoid this, match your flashing metal to your panel metal, or use a non-conductive tape barrier at the contact point, per CMB Roofing.
Final Verdict
Homeowners who take the time to learn how to install metal roofing properly set themselves up for one of the most durable and cost-effective roof replacements available. A DIY metal roof is a realistic project for those with basic to intermediate construction skills, provided they choose the right panel system for their experience level. Corrugated metal roofing is where most DIYers should start. The exposed fastener system is forgiving of minor alignment imperfections, the tools are widely available, and the cost savings over contractor pricing are substantial enough to justify the time investment. Specifically, on a standard 2,000 sq ft gable roof, a careful DIY installation with corrugated steel panels consistently comes in $5,000–$12,000 below contractor quotes. For context on where roofing fits into a broader renovation budget, the kitchen remodel cost breakdown for 2026 shows how roofing typically compares to other major home upgrades.
Standing seam metal roof installation is a different proposition. The hidden clip system demands precision at every stage, specialty tools add upfront cost, and errors in panel alignment or seam forming are difficult to correct without stripping out completed work. First-time installers who want the performance benefits of a standing seam system should consider hiring a professional for the initial project and studying the process before attempting it independently.
The skill gap between panel types matters more than most guides acknowledge. Homeowners who approach a standing seam installation expecting it to resemble corrugated panel work typically encounter problems at the seaming stage. Plan for the system you are genuinely equipped to install, and the result will last 40–70 years with minimal intervention.
For homeowners with a straightforward gable or simple hip roof, adequate DIY experience, and a willing helper for panel positioning, knowing how to install metal roofing correctly makes this one of the highest-return home improvement projects available. The material lasts two to three times longer than asphalt shingles, requires less maintenance, and adds measurable resale value. Take the time to pull the permit, square the first panel perfectly, and control your screw torque, and the roof will reward you for decades.
Frequently Asked Questions
Is metal roofing something a homeowner should attempt to install themselves?
Yes, corrugated panels are accessible to homeowners with basic carpentry experience and comfort working at height. A corrugated panel installation on a simple gable layout is a weekend-scale project for a prepared DIYer with a helper. Standing seam installation, however, is significantly more technical and better suited to experienced DIYers who have completed at least one prior large exterior project.
How much does it cost to install a metal roof?
Material-only costs for corrugated steel panels run $1.50–$4.00 per square foot, while standing seam panel materials range from $2.20 to $8.25 per square foot. Full contractor-installed metal roof cost ranges from $3.50 to $30 per square foot depending on panel type, metal, roof complexity, and region, according to HomeAdvisor. On a 2,000 sq ft roof, most homeowners pay $11,000–$30,000 for professional installation.
How long does a DIY metal roof installation take?
A professional crew completes a standard 2,000 sq ft roof in 1–3 days. By contrast, a homeowner learning how to install metal roofing for the first time typically needs 2–4 weekends working with one helper. More complex roofs with multiple valleys, dormers, and penetrations add significant time to the custom flashing work required at each transition point.
Is it possible to install metal roofing over existing shingles?
Often yes, if local building code permits it and the existing shingle layer is in sound condition. Most jurisdictions cap roofing layers at two total, so a home with one existing layer of shingles qualifies. However, a rigid foam or batten layer installed between the shingles and metal panels is strongly recommended to prevent moisture accumulation and to reduce the print-through of shingle ridges on the metal surface over time, per City Side Roofing.
Do I need a permit to install a metal roof?
In most jurisdictions, yes. Full roof replacements and material changes from one roofing type to another almost always require a permit. Permit fees typically range from $100 to $500 depending on your municipality and project value. Consequently, it is wise to contact your local building department before purchasing materials; installing without a permit risks fines, insurance complications, and problems at the point of sale.
What is the minimum roof pitch for metal roofing?
Corrugated exposed-fastener panels require a minimum pitch of 3:12, meaning 3 inches of rise for every 12 inches of horizontal run, as specified in the lapped-system provisions of IRC Section R905.10, per Interlock Roofing. Standing seam snap-lock systems work on pitches as low as 1:12 with proper underlayment and in-seam sealant. Mechanically seamed standing seam profiles tolerate even lower slopes, down to 0.5:12 in some manufacturer specifications.
What tools do I need to install metal roofing?
Core tools for a corrugated panel installation include: a drill with adjustable clutch, circular saw with metal-cutting carbide blade, tin snips in three cuts, chalk line, tape measure, framing square, and a magnetic sweeper. For standing seam installations, add a turbo shear attachment, hand seamer, and hemming tool. First-time DIYers should budget $200–$500 for tool purchases or rentals beyond standard household tools.
What is the difference between corrugated and standing seam metal roofing?
Corrugated metal roofing uses exposed screws passing through the panel face directly into the roof deck, making installation straightforward but requiring periodic fastener inspection as washers age. A standing seam system attaches with hidden clips locked into raised seams, which eliminates face-fastener leak points and allows thermal expansion. Corrugated systems cost $7–$12 per square foot installed; standing seam systems run $7–$30 per square foot and last 50–70+ years with minimal maintenance, per Western States Metal Roofing.

Leave a Reply