Quick Verdict: Knowing how to find and fix roof leaks before water spreads is one of the highest-value skills a homeowner acquires. Mold growth begins within 24-48 hours of moisture intrusion, and structural damage follows in 4-8 weeks if the source goes untreated. Most minor leaks cost $30-$80 to fix yourself versus $350-$1,500 for a professional repair. The biggest trade-off is safety: roof work above 6 feet carries real fall risk, and any repair on a pitch steeper than 4:12 or near live electrical should go to a licensed roofer.
Last updated: April 2026 | 10 min read
In This Guide
- Roof Leak Overview: Why Speed Matters
- Key Facts at a Glance
- How to Tell If You Have a Roof Leak
- How to Find and Fix Roof Leaks Step by Step
- Emergency Temporary Fixes for a Leaking Roof
- How to Fix a Roof Leak Permanently
- DIY Materials and Tools for Fixing a Roof Leak (With Costs)
- DIY vs. Hiring a Roofer
- Roof Leak Repair by Roof Type
- Pros and Cons of DIY Roof Repair
- How to Prevent Roof Leaks
- Final Verdict
- Frequently Asked Questions
Roof Leak Overview: Why Speed Matters
Learning how to find and fix roof leaks is one of the most urgent home repair skills you need, because water does not wait. Within 24-48 hours of a breach, mold spores begin colonizing wet insulation and wood framing. After 4-8 weeks of an unaddressed leak, structural rot spreads to rafters and sheathing, turning a $150 shingle repair into a $9,000 framing job. This guide walks you through how to find a roof leak from the attic down, roof type-specific repair methods for asphalt shingles, flat EPDM, metal, and tile, plus emergency temporary fixes you perform before a roofer arrives.
Water inside a house almost never enters directly above the stain on your ceiling. Instead, it travels along rafters, insulation batts, and pipe chases before dripping to a low point. Growing up working summers in my grandfather’s plumbing and heating company, I saw this firsthand: a customer’s living room ceiling stain sat 6 feet from the actual entry point, a corroded pipe boot two valleys over. Understanding how water travels is step one in any effective process to find a roof leak.
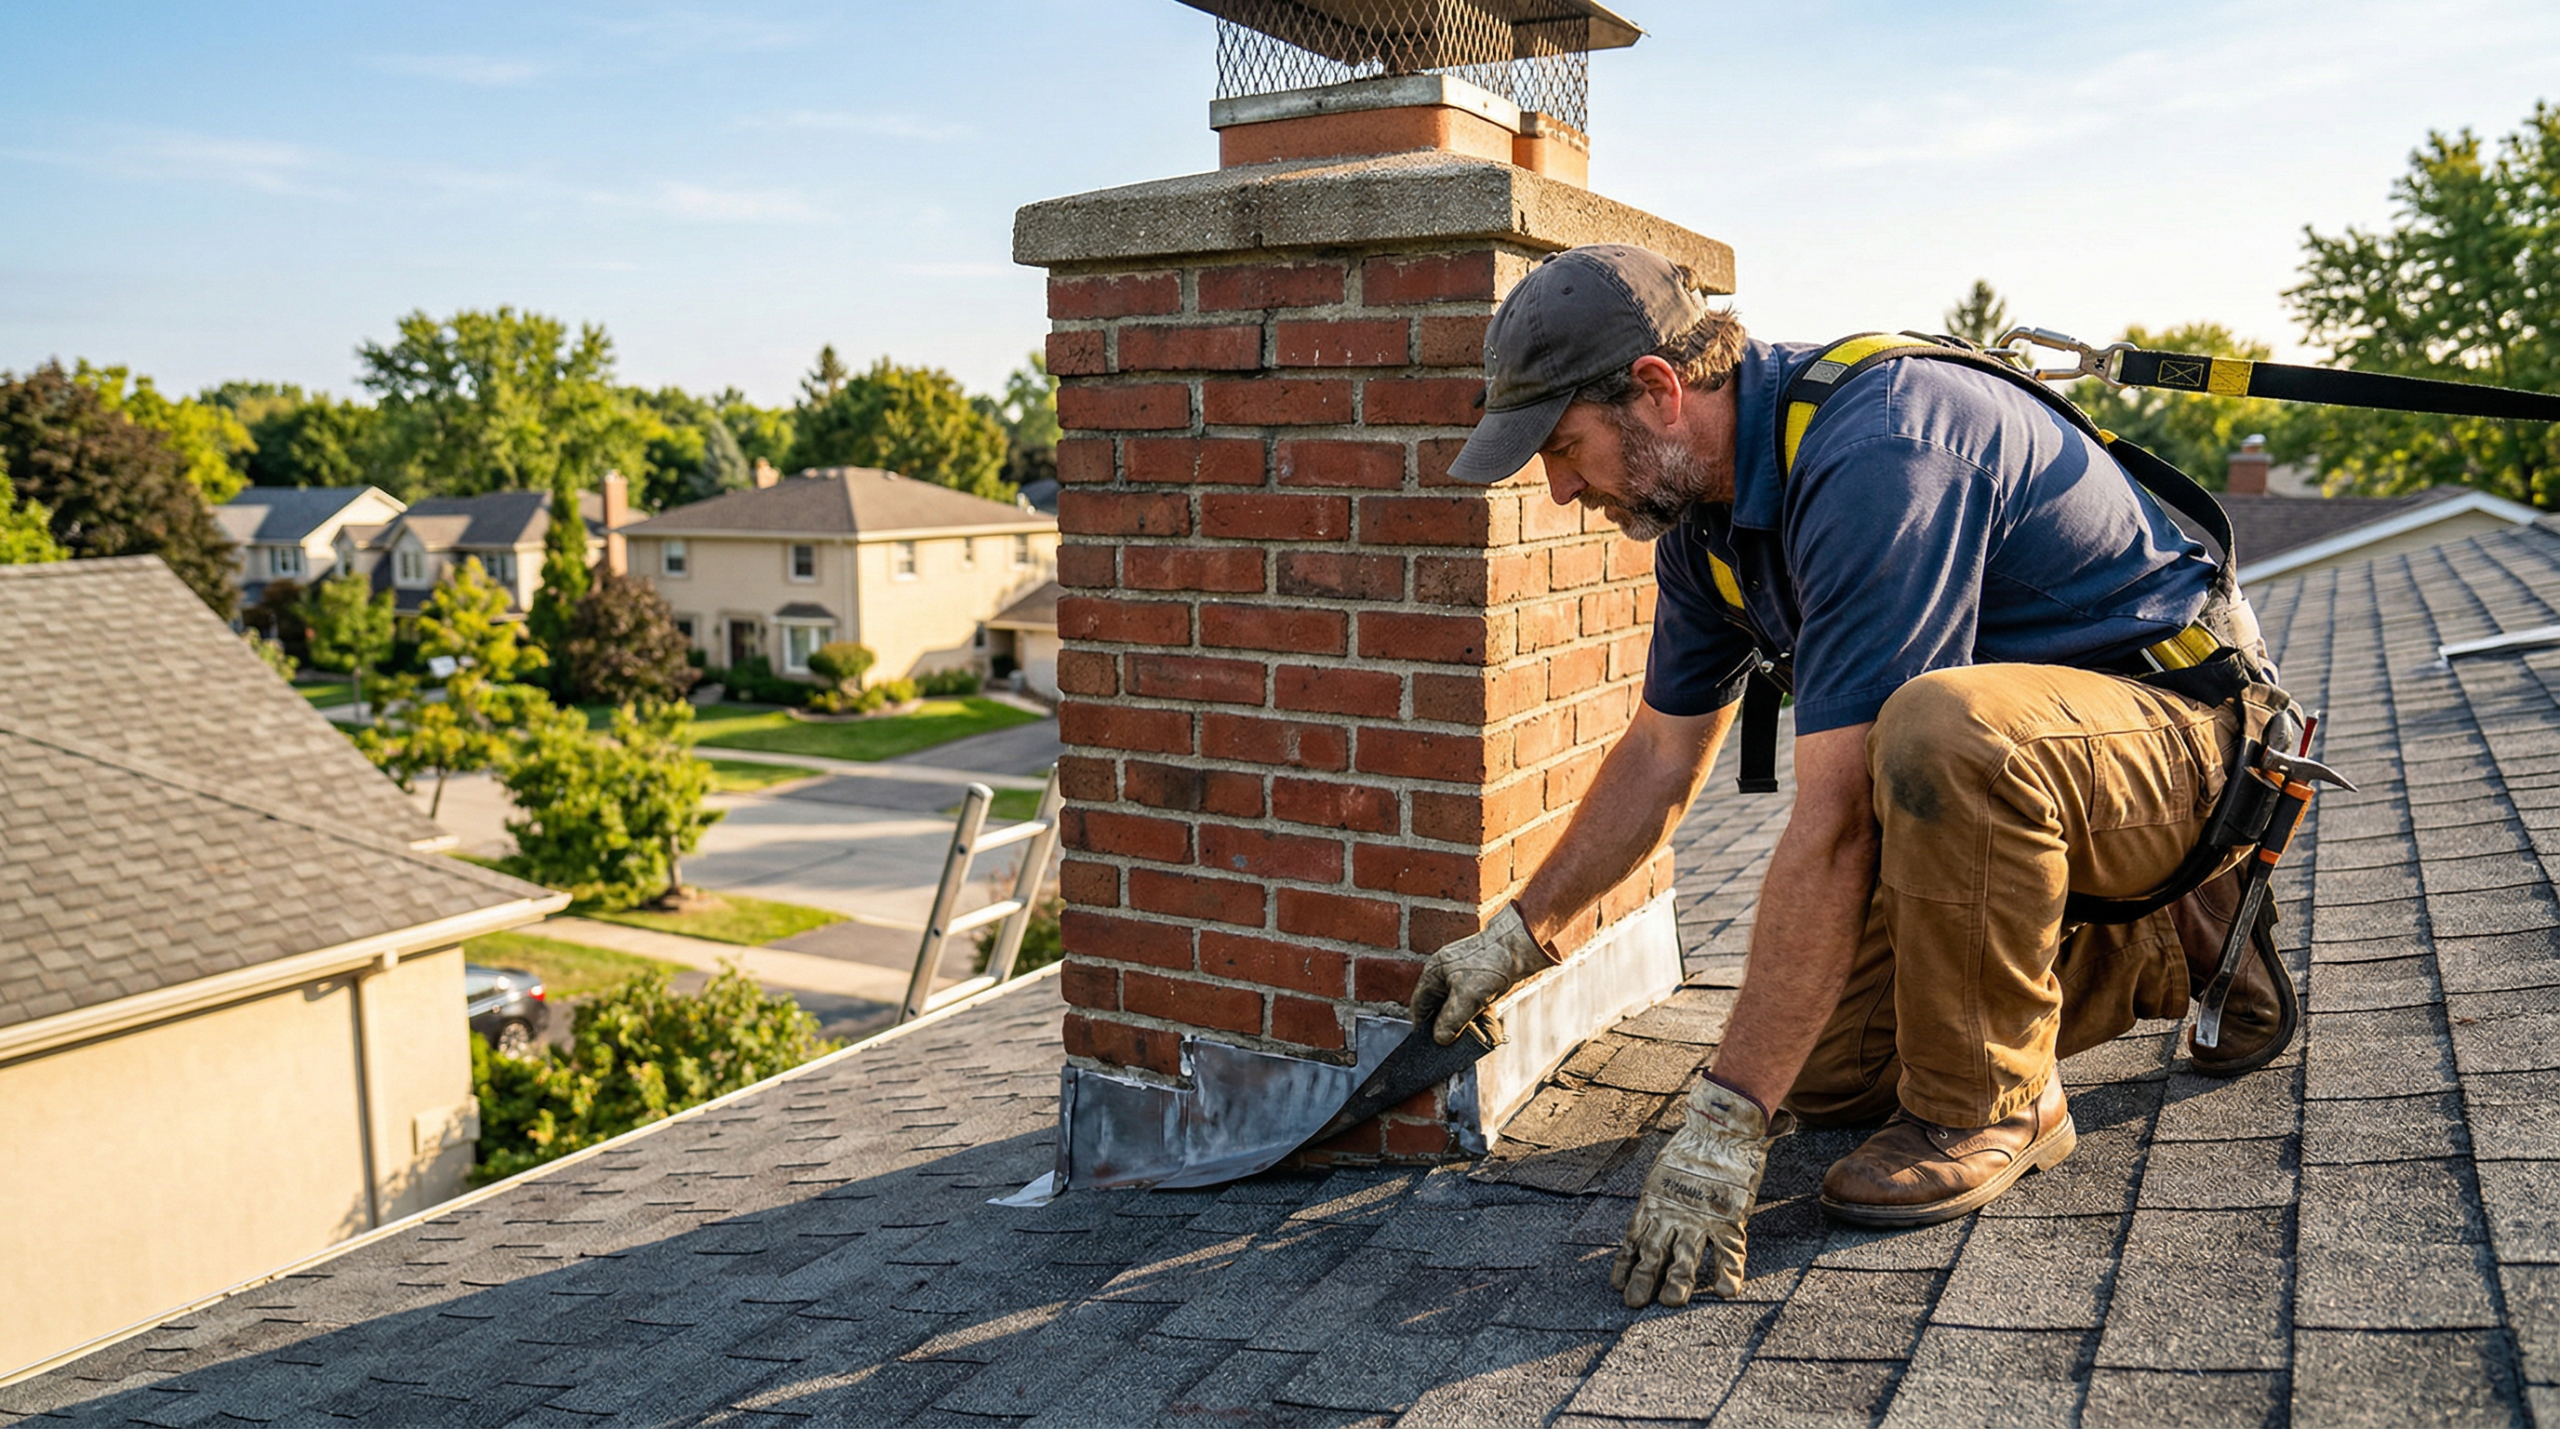
Also worth noting before you climb: most roof leaks originate at penetrations and transitions, not at flat field shingles. Flashing failures around chimneys, skylights, and vent pipes account for roughly 90% of all residential leaks according to the National Roofing Contractors Association (NRCA). Shingle damage is less common as a standalone cause, though hail and wind events do crack or lift shingles and create secondary entry points. Add roof leak prevention to your regular spring schedule; for a full seasonal checklist, see our spring home maintenance checklist.
Key Facts at a Glance
| Factor | Details |
|---|---|
| Mold onset | 24-48 hours after moisture contact |
| Structural damage timeline | 4-8 weeks of ignored leak |
| Average professional repair cost | $350-$1,500 (national average) |
| DIY material cost (minor repair) | $30-$80 |
| Most common leak sources | Flashing, pipe boots, ridge caps, valleys |
| Tools needed (basic) | Flashlight, caulk gun, pry bar, roofing nails, hammer |
| Time to complete (minor repair) | 2-4 hours including attic inspection |
| Full roof replacement cost | $9,000-$22,000+ |
How to Tell If You Have a Roof Leak
A leaking roof rarely announces itself with a stream of water. More often, the signs appear subtly over weeks before the first ceiling stain shows. Knowing the three zones where evidence appears, indoors, in the attic, and on the exterior, lets you catch an active leak before it becomes expensive.
Interior Warning Signs
Brown or yellow ceiling stains are the most visible indicator, but they appear after water has already been traveling through your structure for some time. Also watch for paint bubbling or peeling on ceilings and upper walls, which signals moisture trapped beneath the surface. Musty odors concentrated in one room, especially in upper floors or near dormers, often precede any visible stain by weeks. In severe cases, sagging drywall or plaster indicates water has pooled above a ceiling cavity. Each of these signs warrants a same-day attic inspection, because roof leak detection within the first 24 hours limits secondary damage significantly.
Attic Warning Signs
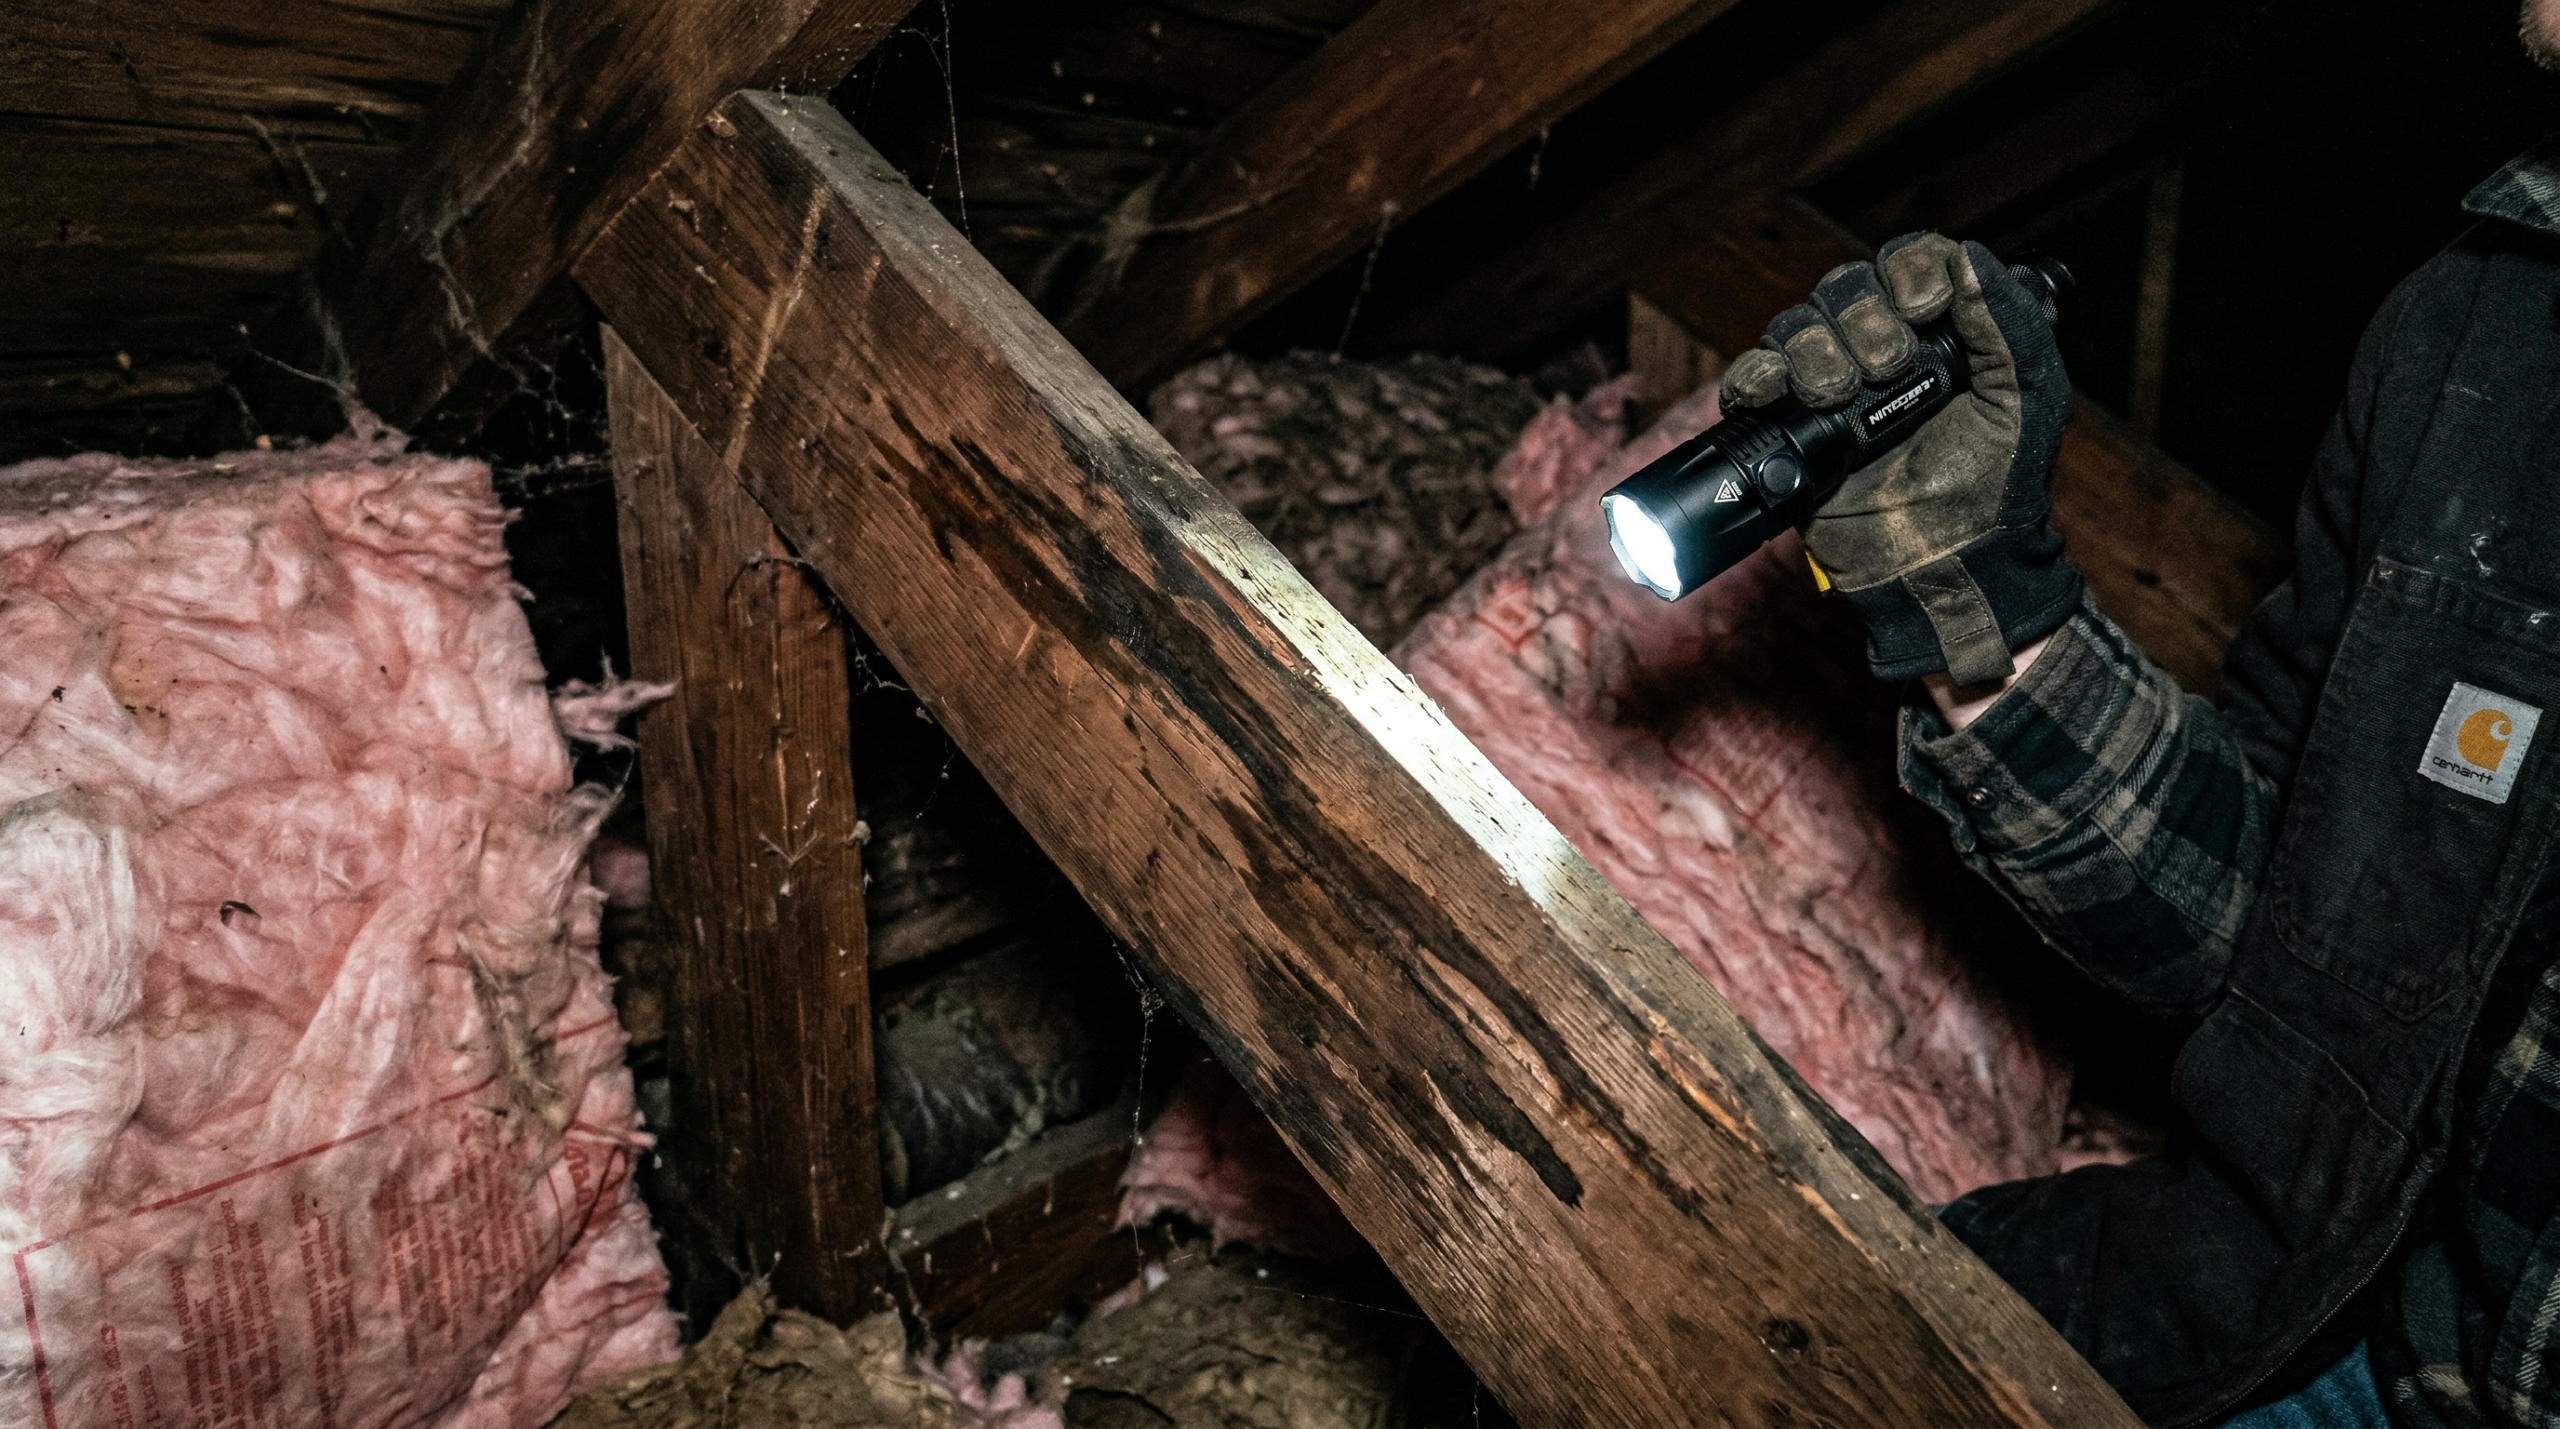
The attic is your best diagnostic tool for locating a leak. Bring a bright flashlight and look for water stains on rafters and sheathing; they appear as dark streaks or discoloration along the wood grain. Active drips during rain point toward the entry, but the entry itself sits uphill from the drip point because water runs along the rafter slope before falling. Check insulation batts for wet or compressed sections, which lose all R-value when saturated. Daylight visible through the roof deck is an obvious failure point. Also look for black mold growth on wood surfaces, which indicates the moisture problem predates your inspection by at least 24-48 hours.
Exterior Signs You Spot From the Ground
Binoculars work well for a safe ground-level inspection. Look for lifted, cracked, or missing shingles in field areas and along ridges. Granule loss leaves asphalt shingles looking patchy or faded compared to surrounding areas, and you often find granule accumulation in gutters below. Damaged or bent step flashing along dormers and chimneys shows as gaps or rust streaks on the siding below. Sagging gutters hold standing water and push it back under fascia boards. Moss or algae growth in shaded valleys holds moisture against shingles and accelerates deterioration.
How to Find and Fix Roof Leaks Step by Step
Systematic leak identification follows a defined path from inside to outside. Skipping steps leads to misdiagnosis and repeat repairs. Proper roof leak detection before any purchase saves both time and money.
Inspect Your Attic With a Flashlight
Enter the attic during or shortly after rain if safe. Follow any water stain or drip point and trace the wet wood uphill along the rafter, toward the peak. Mark the highest stained point with chalk or tape. After the roof dries, measure the horizontal and vertical distance from the marked point to the nearest ridge or gable end. Transfer those measurements to the exterior surface to identify the likely entry zone. This method gets you within 18-24 inches of the actual breach point in most cases.
Trace the Water Path Uphill
Water travels the path of least resistance, always moving downhill along the slope of the rafter. Because of this, the interior stain sits anywhere from 6 inches to 8 feet downhill from the actual roof breach. In my grandfather’s service work, we tracked one leak across three rafters and two rooms before finding a $12 cracked pipe boot collar as the source. Never assume the ceiling stain is directly below the entry point. Instead, follow the wet wood grain uphill with your flashlight until the discoloration stops, then look for the breach above the discoloration’s end.
Check High-Risk Entry Points First
Flashing, vent boots, valleys, ridge caps, and nail pops cause the vast majority of residential roof leaks. Inspect these before examining field shingles. Pipe boots, the rubber collars around plumbing vents, crack and shrink with UV exposure, typically failing after 10-15 years. Step flashing along chimneys and dormers lifts when sealant dries out or fasteners corrode. Valley metal collects debris, holds moisture, and eventually rusts through. Nail pops occur when fasteners back out and pierce the shingle above, leaving a pinhole entry. Each of these failure points requires a distinct repair approach, covered in the permanent fixes section below.
The Garden Hose Test
When attic tracing does not isolate the entry, the hose test gives you reliable results in 30-60 minutes for finding the active entry point. Work with a partner: one person stays in the attic, the other runs water on the roof in isolated zones. Start at the lowest point of the suspected area and soak each 4-foot section for 2-3 minutes before moving uphill. The attic observer calls out the moment dripping begins, identifying the active zone. This approach pinpoints the breach within a 4-foot section without guesswork. Avoid running water on the entire roof at once, because broad saturation makes the entry point impossible to isolate.
Condensation vs. Leak: How to Tell the Difference
Condensation produces moisture on interior roof surfaces without any exterior breach, and misdiagnosing it sends you on a pointless shingle inspection. Condensation typically appears as widespread, uniform dampness across a large area of the underside of the roof deck, often worse in cold months when warm interior air hits cold sheathing. In contrast, a true leak produces localized staining along a rafter path or at a specific penetration, and the moisture worsens during or after rain. Check your attic ventilation: inadequate ridge-to-soffit airflow creates the temperature differential responsible for condensation. Adding soffit vents or a ridge vent often resolves the problem without any roof repair at all.
Emergency Temporary Fixes for a Leaking Roof
An active leak during rain requires an immediate response while you arrange proper repairs. These temporary methods buy 30-90 days at most before permanent repair is needed. None of them restore structural integrity or long-term weatherproofing.
Cover With a Tarp During Active Rain
A heavy-duty polyethylene tarp (6-mil or thicker) laid over the damaged area and secured with 2×4 boards sandwiched over the tarp edges provides the fastest emergency protection. Position the tarp to extend at least 4 feet past the suspected entry point in all directions and run it over the ridge so wind cannot lift it from the uphill side. Secure the boards with roofing nails or deck screws driven into the roof deck, not the tarp itself. A 10×12 tarp costs $15-$40 and holds up for 30-60 days in normal weather. Do not go on a wet or icy roof; wait for dry conditions and use fall protection.
Apply Roofing Cement or Sealant
Roofing cement, sometimes sold as flashing cement or plastic roof cement, fills cracks, seals lifted shingle edges, and patches small holes in the roof deck. Spread it with a putty knife or caulk gun onto the dry surface around the suspected entry point, pressing the material at least 2 inches beyond the visible damage on all sides. A tube costs $8-$30 depending on formulation. Silicone roof sealant works better on metal surfaces and around pipe boots, while asphalt-based cement bonds well to shingles and felt. Both are temporary measures. UV exposure, thermal cycling, and continued water contact degrade the patch within one to two seasons.
Use Self-Adhesive Roofing Tape
Butyl-backed self-adhesive flashing tape bonds to clean, dry surfaces and provides a waterproof seal over cracks and seams. Apply it to a swept and dried surface, pressing firmly from the center outward to eliminate air pockets. One roll costs $20-$40 and covers approximately 50 linear feet. The tape performs well as a temporary fix on flat roof seams and around pipe penetrations. However, adhesion weakens on asphalt shingles in heat above 90°F, so monitor it after summer heat events. For a permanent repair, remove the tape and address the underlying cause directly.

How to Fix a Roof Leak Permanently
Permanent repairs address the source of water entry directly. The method depends on the roof type and the failure point. Each approach below applies to a specific scenario identified during your inspection.
Replace a Damaged or Missing Shingle
Lift the edges of the surrounding shingles to expose the nails securing the damaged piece. Remove the nails with a pry bar, slide out the damaged shingle, and slide the replacement into the same position with the top edge under the course above. Secure with four roofing nails placed 1 inch from each side edge and 1 inch above the cutouts. Press the overlapping shingle tabs back down and apply a small dab of roofing cement under each tab corner to reseal. Replacement shingles cost $30-$80 per bundle; one bundle covers 33 square feet and matches standard 3-tab and architectural shingle sizes.
Repair or Replace Flashing
Roof flashing repair around chimneys, skylights, and vent pipes ranks as the most common permanent fix a homeowner performs. For a cracked sealant joint, scrape out the old caulk, clean the surface with a wire brush, and apply fresh roofing caulk or polyurethane sealant rated for exterior use. A lifted or separated step flashing piece gets re-seated, secured with a roofing nail, and sealed along the top edge. If the flashing metal itself has corroded through, replacement is necessary. Aluminum step flashing in 10-packs costs $15-$25 and installs by weaving each piece alternately under a shingle course and against the adjoining wall. A full chimney roof flashing repair is more involved and runs $300-$950 professionally if you prefer not to tackle it yourself.
Fix a Flat Roof Leak (EPDM/TPO Patch)
Flat roofs use EPDM rubber or TPO membrane, and repairs require compatible materials. For EPDM, clean the damaged area with EPDM primer, let it dry for 10 minutes, then apply a self-adhesive EPDM patch at least 6 inches larger than the damage on all sides. Press firmly from center outward. For TPO, heat welding provides the strongest bond, though self-adhesive TPO patches work for small repairs under 6 inches. EPDM patch kits cost $20-$50. A professional flat roof leak repair runs $300-$800 depending on the extent of membrane damage.
Fix a Metal Roof Leak
Metal roof repairs differ by panel type. Standing seam leaks at seam joints respond to butyl tape and seam sealant applied to the cleaned joint. Exposed fastener panels develop leaks when neoprene washers under the screws degrade; replacing the screws with new fasteners and fresh washers costs almost nothing per screw and resolves most fastener-related leaks. Larger panel damage or corrosion through the metal requires section replacement or overlay panels. Metal roof minor repairs run $400-$700 professionally, while major panel replacements reach $1,500-$2,500. For a complete walkthrough of metal roof systems and installation standards, see our guide on how to install metal roofing.
DIY Materials and Tools for Fixing a Roof Leak (With Costs)
A basic DIY repair kit covers most shingle and flashing scenarios. Buying these items individually at a hardware store runs $30-$80 for a minor single-source repair.
| Item | Use | Estimated Cost |
|---|---|---|
| Roofing cement (tube) | Sealing shingle edges, small cracks | $8-$30 |
| Self-adhesive roofing tape (roll) | Seams, flashing transitions | $20-$40 |
| Replacement shingles (bundle) | Damaged or missing shingle replacement | $30-$80 |
| Aluminum step flashing (10-pack) | Wall-to-roof transitions | $15-$25 |
| Roofing nails (1 lb) | Shingle and flashing fastening | $4-$8 |
| Waterproof tarp (10×12) | Emergency coverage during active rain | $15-$40 |
| EPDM rubber patch kit | Flat roof membrane repair | $20-$50 |
| Silicone roof sealant | Metal roof joints, vent boots | $8-$20 |
| Caulk gun | Applying sealant and cement | $5-$15 |
For a simple single-shingle replacement with roofing cement and nails, your total material spend comes to approximately $40-$50. You need the EPDM patch kit and roofing tape only for flat roof or emergency tarp scenarios, pushing the total toward $80 for those jobs.

DIY vs. Hiring a Roofer
The decision to repair an active roof leak yourself or hire a professional comes down to three factors: the pitch of your roof, the complexity of the repair, and the extent of structural damage. Simple shingle replacements and sealant repairs on low-pitch roofs are well within DIY reach. Steep-pitch work, multi-layer flashing systems, and repairs near the peak belong to professionals.
Signs the Repair Is Beyond DIY
Hire a licensed roofer when: the pitch exceeds 4:12 (the OSHA threshold for mandatory fall protection), the damaged area covers more than one square (100 square feet), the roof deck shows soft spots or rot, or the leak originates from chimney counter flashing requiring masonry work. Also call a professional for any repair requiring scaffolding, work near power lines, or tile roof restoration, since tile roofs crack under foot traffic without proper staging boards.
Cost Comparison Table
| Repair Type | DIY Cost | Professional Cost |
|---|---|---|
| Single shingle replacement | $30-$50 | $150-$300 |
| Larger shingle section | $50-$80 | $300-$750+ |
| Pipe boot replacement | $20-$40 | $250-$500 |
| Step flashing repair | $15-$35 | $200-$950 |
| Chimney flashing | $50-$100 | $300-$950 |
| Flat roof (EPDM) patch | $20-$50 | $300-$800 |
| Metal roof minor repair | $30-$60 | $400-$700 |
| Full roof replacement | Not DIY | $9,000-$22,000+ |
How to Find and Fix Roof Leaks by Roof Type
Each roofing material requires a different diagnostic approach and repair method. Understanding your roof type before you attempt to find a roof leak determines both the tools and the materials you need.
Asphalt shingles cover roughly 80% of U.S. residential roofs. They fail most often at nail pops, cracked tabs, and dried flashing sealant. Repairs are the most straightforward of any material type and cost the least in DIY materials. Shingle replacement and flashing re-sealing resolve the overwhelming majority of asphalt leaks.
Flat roofs use EPDM rubber or TPO membrane and fail at seams, penetrations, and pooling areas where water sits for extended periods. Unlike sloped roofs, water on a flat roof has nowhere to drain quickly, so small membrane punctures grow into large leaks faster. Proper repairs require membrane-compatible adhesives and patches; standard roofing cement damages EPDM surfaces, so never apply it to rubber membrane roofs.
Metal roofs, specifically standing seam and corrugated steel panels, last 40-70 years with minimal maintenance but still develop leaks at fastener points and panel joints as sealants age. Because metal expands and contracts significantly with temperature changes, rigid patches fail faster than flexible butyl-based solutions. Compared to asphalt, metal roof flashing repair and seam issues are simpler to locate because the entry point is almost always at a visible fastener or seam rather than in field material.
Tile roofs (clay or concrete) do not leak through the tile itself in most cases. Instead, the underlayment beneath the tiles absorbs water when tiles crack, shift, or lose their mortar bedding at ridges and hips. Replacing broken tiles requires careful staging boards to distribute weight; walking directly on tile cracks adjacent pieces and creates new entry points. Because of this staging requirement, tile roof repair is among the least DIY-friendly of all roof types.
Pros and Cons of DIY Roof Repair
Pros
- Saves $120-$900+ per repair on common leak fixes
- Minor repairs take 2-4 hours start to finish
- Materials cost $30-$80 for most single-source leaks
- No scheduling delay; address the leak the same day
- Builds diagnostic skill for faster future detection
- Works on most low-pitch asphalt and flat roof sections
- Temporary fixes buy 30-90 days before professional scheduling
Cons
- Fall risk is significant above 6 feet; pitches steeper than 4:12 require fall arrest equipment per OSHA standards
- Misdiagnosis leads to repeat repairs and wasted materials
- DIY patches on flashing often fail within 1-2 seasons without full flashing replacement
- Voiding roof warranties is possible if repair method does not follow manufacturer specs
- Structural rot and deck damage are not visible until you open the roof
- Insurers sometimes deny claims for DIY repairs when documentation shows improper methods
How to Prevent Roof Leaks
Annual inspections and routine maintenance prevent most roof leaks before they start. The majority of residential leaks develop from deteriorated sealants and blocked drainage rather than sudden material failure. A consistent maintenance routine costs $0 in labor if you do it yourself and takes 2-3 hours per year.
Each spring, inspect all pipe boot collars for cracking or separation from the vent pipe. Rubber boots last 10-15 years and cost $10-$25 to replace before they fail. Clean gutters twice yearly, specifically in late fall after leaf drop and in early spring, because blocked gutters cause ice dams in cold climates and push water back under fascia boards in wet climates. Check for lifted or missing ridge cap shingles after any windstorm with gusts above 45 mph, since ridge caps receive the most direct wind loading of any roof section.
Trim branches overhanging the roof to at least 6 feet of clearance. Branches deposit leaves and debris in valleys, which retain moisture and accelerate shingle deterioration. Also check attic ventilation annually: a properly ventilated attic maintains temperature equilibrium between interior and exterior, reducing ice dam formation in winter and condensation year-round. Add the roof inspection to your full seasonal maintenance routine; our spring home maintenance checklist covers the complete sequence from roof to foundation.
When repairs add up to more than 30% of a full replacement cost, replacement becomes the financially sound choice. Ongoing roof leak detection during annual inspections catches new failures early and prevents multi-repair seasons. If your shingle roof is over 20 years old and you face a third or fourth localized repair in two seasons, the underlying underlayment has likely degraded across the whole surface. For context on how roofing costs fit into larger renovation budgets, our kitchen remodel cost guide for 2026 covers how to prioritize structural repairs versus cosmetic upgrades when planning home improvement spending.
Final Verdict
Knowing how to find and fix roof leaks gives homeowners a meaningful financial advantage. Most minor leaks, a cracked pipe boot, a lifted shingle, a dried flashing joint, cost $30-$80 in materials and a few hours of weekend work. The same repairs billed by a roofing contractor run $150-$950 depending on the access difficulty and the market. For any homeowner comfortable on a ladder and willing to work methodically, the DIY path produces real savings on the most common leak scenarios.
The real trade-off is safety and diagnostic accuracy. Falls from roofs account for thousands of emergency room visits annually in the United States, and overconfident misdiagnosis wastes money on the wrong repair. If the roof pitch exceeds 6:12, the damage extends more than one full square, or the deck shows soft spots, the job needs a licensed roofer. No repair savings offset a trip to the emergency room.
From a value standpoint, the investment in a basic repair kit, cement, tape, a bundle of matching shingles, and a quality flashlight, pays for itself on the first repair and remains useful for years of routine maintenance. Knowing how to find and fix roof leaks is among the highest-return DIY skill sets in the home maintenance category, second only to plumbing basics in the frequency with which they save homeowners from an unnecessary service call.
For straightforward repairs on asphalt-shingled homes, tackle the job yourself using the step-by-step process in this guide. Flat roofs, metal roofs, and any situation where the entry point remains unclear after two inspection attempts all warrant a professional, who brings both the diagnostic tools and the fall protection equipment the job requires. Annual maintenance, combined with immediate response when signs appear, keeps most roofs leak-free for their full 20-30 year service life.
Frequently Asked Questions
How do I find where my roof is leaking?
Start in the attic with a flashlight during or after rain. Follow any water stain or drip point uphill along the rafter toward the peak, because water travels downhill from the actual breach point. Mark the highest stained spot, transfer those measurements to the exterior, and inspect within 18-24 inches of the identified location. On dry days, the garden hose test, soaking each 4-foot zone for 2-3 minutes while a partner watches from the attic, isolates the breach quickly and helps you find a roof leak without waiting for rain.
Is roof leak repair something I do myself?
Most minor leaks on low-pitch asphalt shingle roofs are within DIY range for homeowners comfortable working on a ladder. Shingle replacement, pipe boot swaps, and flashing sealant repairs are straightforward with basic hand tools. However, pitches steeper than 4:12, structural deck damage, and complex multi-layer chimney flashing systems belong to licensed professionals. OSHA defines any slope above 4:12 as steep, requiring fall protection equipment.
How much does it cost to fix a roof leak?
DIY material costs run $30-$80 for most minor single-source repairs. A professional charges $100-$500 for small leaks, $200-$950 for flashing repairs, and $300-$800 for flat roof patches. The national average across all repair types is $350-$1,500. Full replacement when the roof is beyond repair runs $9,000-$22,000 or more depending on size, pitch, and material.
What causes a roof to leak?
Flashing failures around chimneys, skylights, and vent pipe boots cause approximately 90% of residential leaks. The remaining failures come from cracked or missing shingles, damaged valley metal, clogged gutters backing water under the fascia, and ice dams in cold climates. Aging rubber pipe boots (typically failing after 10-15 years), dried flashing sealant, and corroded fasteners on metal roofs are the three most common single points of failure a homeowner finds during an attic inspection.
How long does a roof leak go unnoticed?
A slow leak in an unfinished attic above unused living space goes unnoticed for months or years, especially when insulation absorbs moisture before it reaches the ceiling below. Active mold growth begins within 24-48 hours of the first moisture contact, so even a slow leak causes biological damage long before you see a ceiling stain. Structural rot in rafters and sheathing begins in 4-8 weeks of sustained moisture exposure. Annual attic inspections catch these slow leaks before secondary damage multiplies the repair cost.
How do you temporarily stop an active roof leak?
Three emergency methods work in active rain or while waiting for a permanent repair: covering the area with a heavy-duty polyethylene tarp secured over the ridge and weighted with 2×4 boards, applying roofing cement or silicone sealant to the dry breach point, and using self-adhesive butyl roofing tape over seams and cracks. Each method buys 30-90 days of protection at most. None of them substitute for proper permanent repairs, and all lose effectiveness faster in heat, UV exposure, and freeze-thaw cycles.
Does a roof leak cause mold?
Roof leaks cause mold in 24-48 hours of initial moisture contact on organic materials like wood framing, insulation batts, and drywall. Mold remediation in an attic costs $1,000-$4,000 depending on the extent of growth, far exceeding the cost of the original roof repair. Addressing a leaking roof within 24 hours of detection prevents mold establishment in most cases. After repairs, ensure proper attic ventilation to dry residual moisture; a dehumidifier placed in the attic space for 48-72 hours after repair helps as well.
When should I call a roofer instead of fixing it myself?
Call a licensed roofer when the roof pitch exceeds 4:12, the damaged area exceeds 100 square feet, the roof deck shows soft spots or visible rot, the leak source is unclear after two inspection attempts, or the repair requires chimney masonry work. Also hire a professional for tile roof repairs, any repair near live power lines, and situations where your homeowner’s insurance claim requires documentation of licensed workmanship. The $150-$950 professional cost is a far better outcome than a fall injury or an improperly completed repair voiding your remaining warranty coverage.


Leave a Reply