Photo by irina88w via iStock
Changing the flooring in your house doesn’t have to be difficult. So why not try a laminate floor installation you can DIY with some tips? After all, laminate flooring is popular these days.
Not only do these hardwood-like planks are durable, but they also come in a variety of colors and designs.
And you can install laminate flooring yourself. It’s one of the more interesting DIY projects you can implement for home improvement. And we’ve prepared some tips for you!
Find the summary below before you move on to the tips that will help your job go smoothly.
Table of Contents
- Get Your Tools Ready
- Get Your Measurements Done
- Prep Your Subfloor
- Install the Underlayment
- Use a Randomized Stagger
- Take Your Time
- Avoid Heavy Furniture
- Add Finishing Touches
Laminate Floor Installation DIY Tips: Get Your Tools Ready
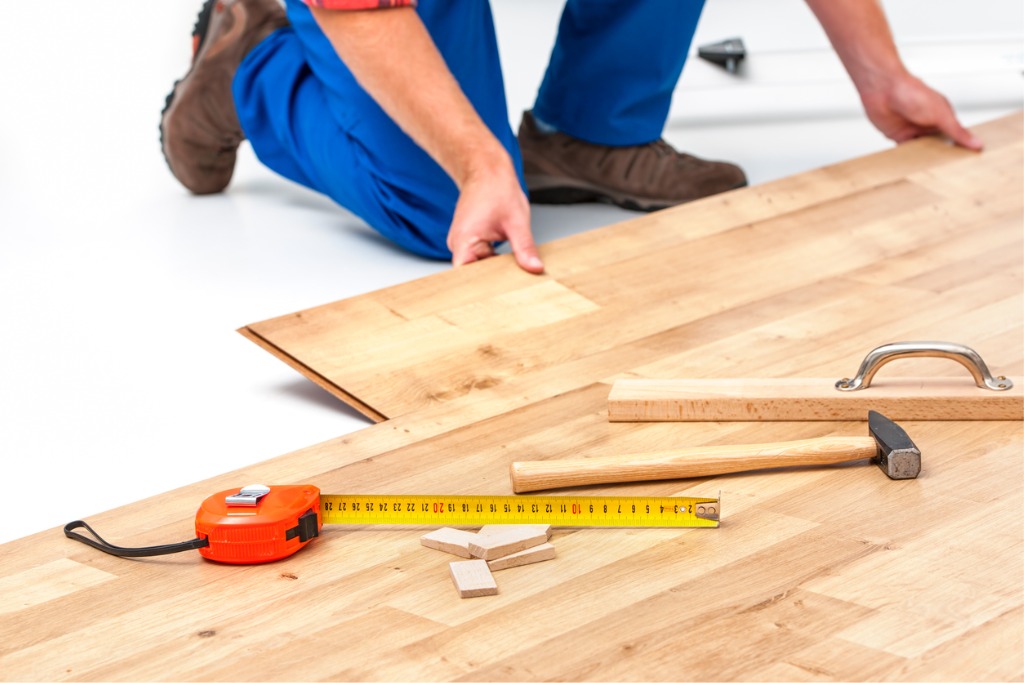
Photo by AlexRaths via iStock
Before moving ahead with your laminate flooring installation, the first thing to do is gather all the necessary materials and tools.
Not just the laminate planks; you need some sandpaper, a jigsaw, a table saw, hammers, a measuring tape, duct tape, safety glasses, dust masks, and spacers.
It’s usually best to have a checklist of items and complete them before you start the job. So pay a visit to your nearest hardware store or borrow some tools from friends if you don’t have them.
Learn more about useful laminate floor installation tools in the video above by Back to the Basics 101.
Get Your Measurements Done
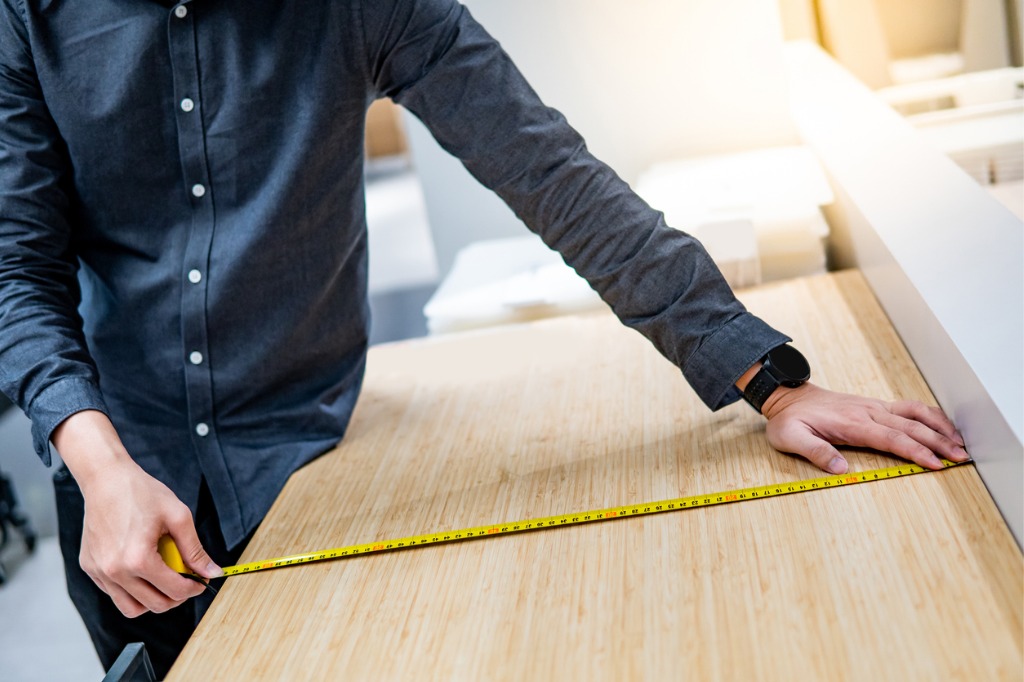
Photo by Zephyr18 via iStock
Before you proceed with the laminate flooring installation, you must measure the area where you plan to lay down the flooring. This step is crucial because it helps ensure enough spaces along each edge of the board to allow for expansion.
Also, when you finally lay down pieces of laminate, use spacers around the perimeter of the flooring whenever possible. These handy little strips of wood or plastic will measure a 3/8-inch gap that will allow the flooring to contract and expand with heat and humidity.
Getting your measurements done ahead of time saves you a lot of effort in cutting the planks to fit the room. So knowing the layout of the room you’re working on is essential to laying out the flooring.
If you’re not confident about your math, you might want to get a professional installer’s help instead.
Laminate Floor Installation DIY Tips: Prep Your Subfloor
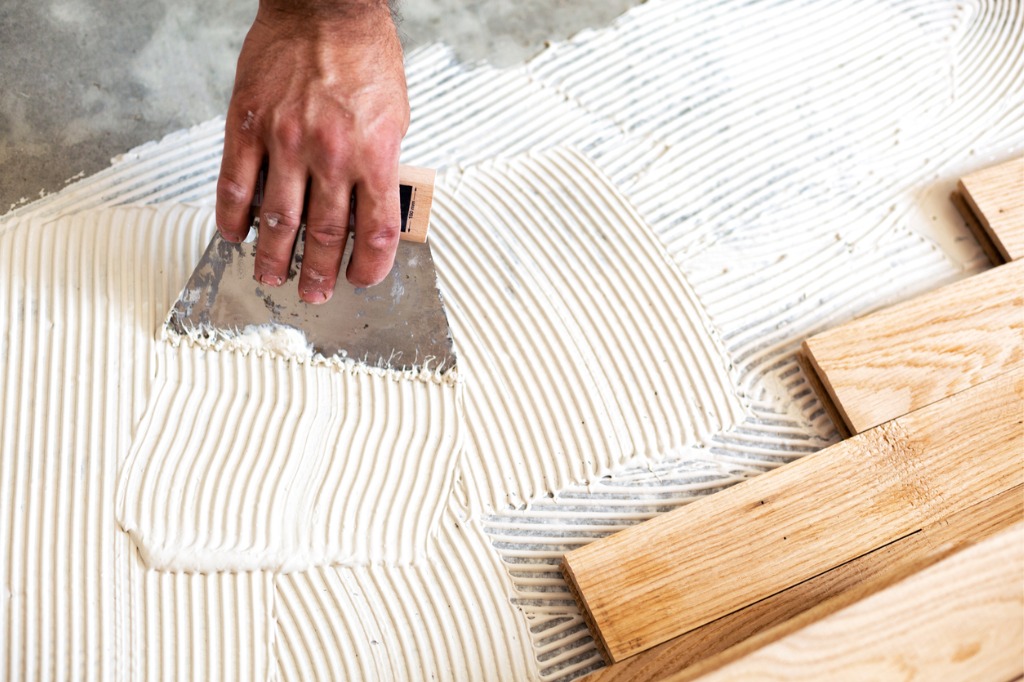
Photo by didesign021 via iStock
Before laying down your laminate flooring, lay out the pieces of wood in the room where you are installing them. You should allow them at least 48 hours to adapt to your house’s temperature and humidity.
As for the subfloor, you should remove all baseboards and trim surrounding the area where you are installing the floor.
You’ll want to ensure your subfloor is free of moisture, dust, dirt, grease, oil, grime, and anything else that could cause problems down the road. You can do this by vacuuming debris, mopping the floor thoroughly, and wiping it dry. Then, use a tack cloth to wipe away any residue left behind.
In fact, you might have to sweep as you install because installing laminate flooring is a dusty job.
Make sure the subfloor is flat. Use a flooring repair compound to fill it in if there are any gouges or rough patches. Also, use a sander to ensure a smooth surface.
Install the Underlayment

Photo by yunava1 via iStock
Before installing your laminate flooring, it’s important to lay down a solid base. You’ll do this by laying down some underlayment on the existing concrete slab, plywood subfloor, or wood joists.
This thin, dense foam is usually installed beneath carpet or hardwood floors. It helps dampen noise and makes your floors warmer. In addition to providing comfort, it can also act as a barrier against moisture damage.
Some laminate floor manufacturers offer preinstalled underlayment. If they don’t, buy it separately. To ensure a smooth installation, we recommend starting with two layers of underlayment. Then trim the pieces to size with a utility knife.
Laminate Floor Installation DIY Tips: Use a Randomized Stagger
Photo by SasinParaksa via iStock
It also helps to figure out the flooring pattern before laying down the first row of planks. We suggest you use a randomized stagger as your pattern.
Differentiate the placement of the plans every two or three rows. Doing this will highlight the beauty of the wooden planks you’re installing.
If you’re looking for a more uniform pattern, you can use H-pattern or stair-step pattern. But the randomized stagger will have a more natural look and bring attention to the laminate itself.
Take Your Time
The next step is to lay down the first row of laminate flooring. Start slowly and pay attention to set things out properly. If you do it incorrectly, you might have to start again from scratch. So take your time at this phase.
Start by placing one edge of the board against the wall. Then place the second edge of the board against that same spot. Continue doing this until you reach the opposite side of the room.
If you’re unsure where to start, pick a side and lay the boards. After finishing one row, move on to the next one.
Laminate Floor Installation DIY Tips: Avoid Heavy Furniture
It’s crucial to avoid placing any furniture directly on laminate flooring when you’re installing it. This includes tables, chairs, and bookcases because the item’s weight could damage the floor covering.
In addition, heavy objects like those mentioned above are likely to scratch the surface, causing unsightly marks.
The good news is that most manufacturers offer warranties that cover scratches caused by furniture. However, some companies don’t provide such coverage, so it’s always wise to check the warranty terms carefully.
Add Finishing Touches

Photo by Pawel_B via iStock
The final step in installing laminate flooring is to add some finishing touches. This includes baseboard molding, door thresholds, and even caulking around the baseboards. Avoid cutting corners here because the finish might look sloppy.
In addition to making sure you’ve finished everything else properly, there are a few additional steps you’ll want to take.
For example, make sure that you’re laying down a solid caulk on the floors. This ensures you don’t have noticeable expansion gaps on the flooring. Choose a material that allows your flooring to expand and contract heat and humidity, like silicone.
You might also want to install trim pieces around doors and windows. These include things like crown moldings, window frames, and doorframes.
With that, you have some solid laminate floor installation tips to help ensure your project goes smoothly.
Learn More: